What you need
| Program nano ID | A short identifier for your program. Stell provides it (or a pre-filled configurator link) during onboarding — contact support if you don’t have yours. |
| Member identifier | Each visitor’s or recipient’s ID from your own systems — whatever your CRM uses as the member ID, typically a UUID like 8e4a00f7-e6da-4048-9684-b42801178375. An email address also works. Your site template or email tool fills this in per person. |
The configurator
Open the configurator at stell.in/embed/configurator. It has two tabs: On your site for embedding the button in web pages, and In your emails for email templates.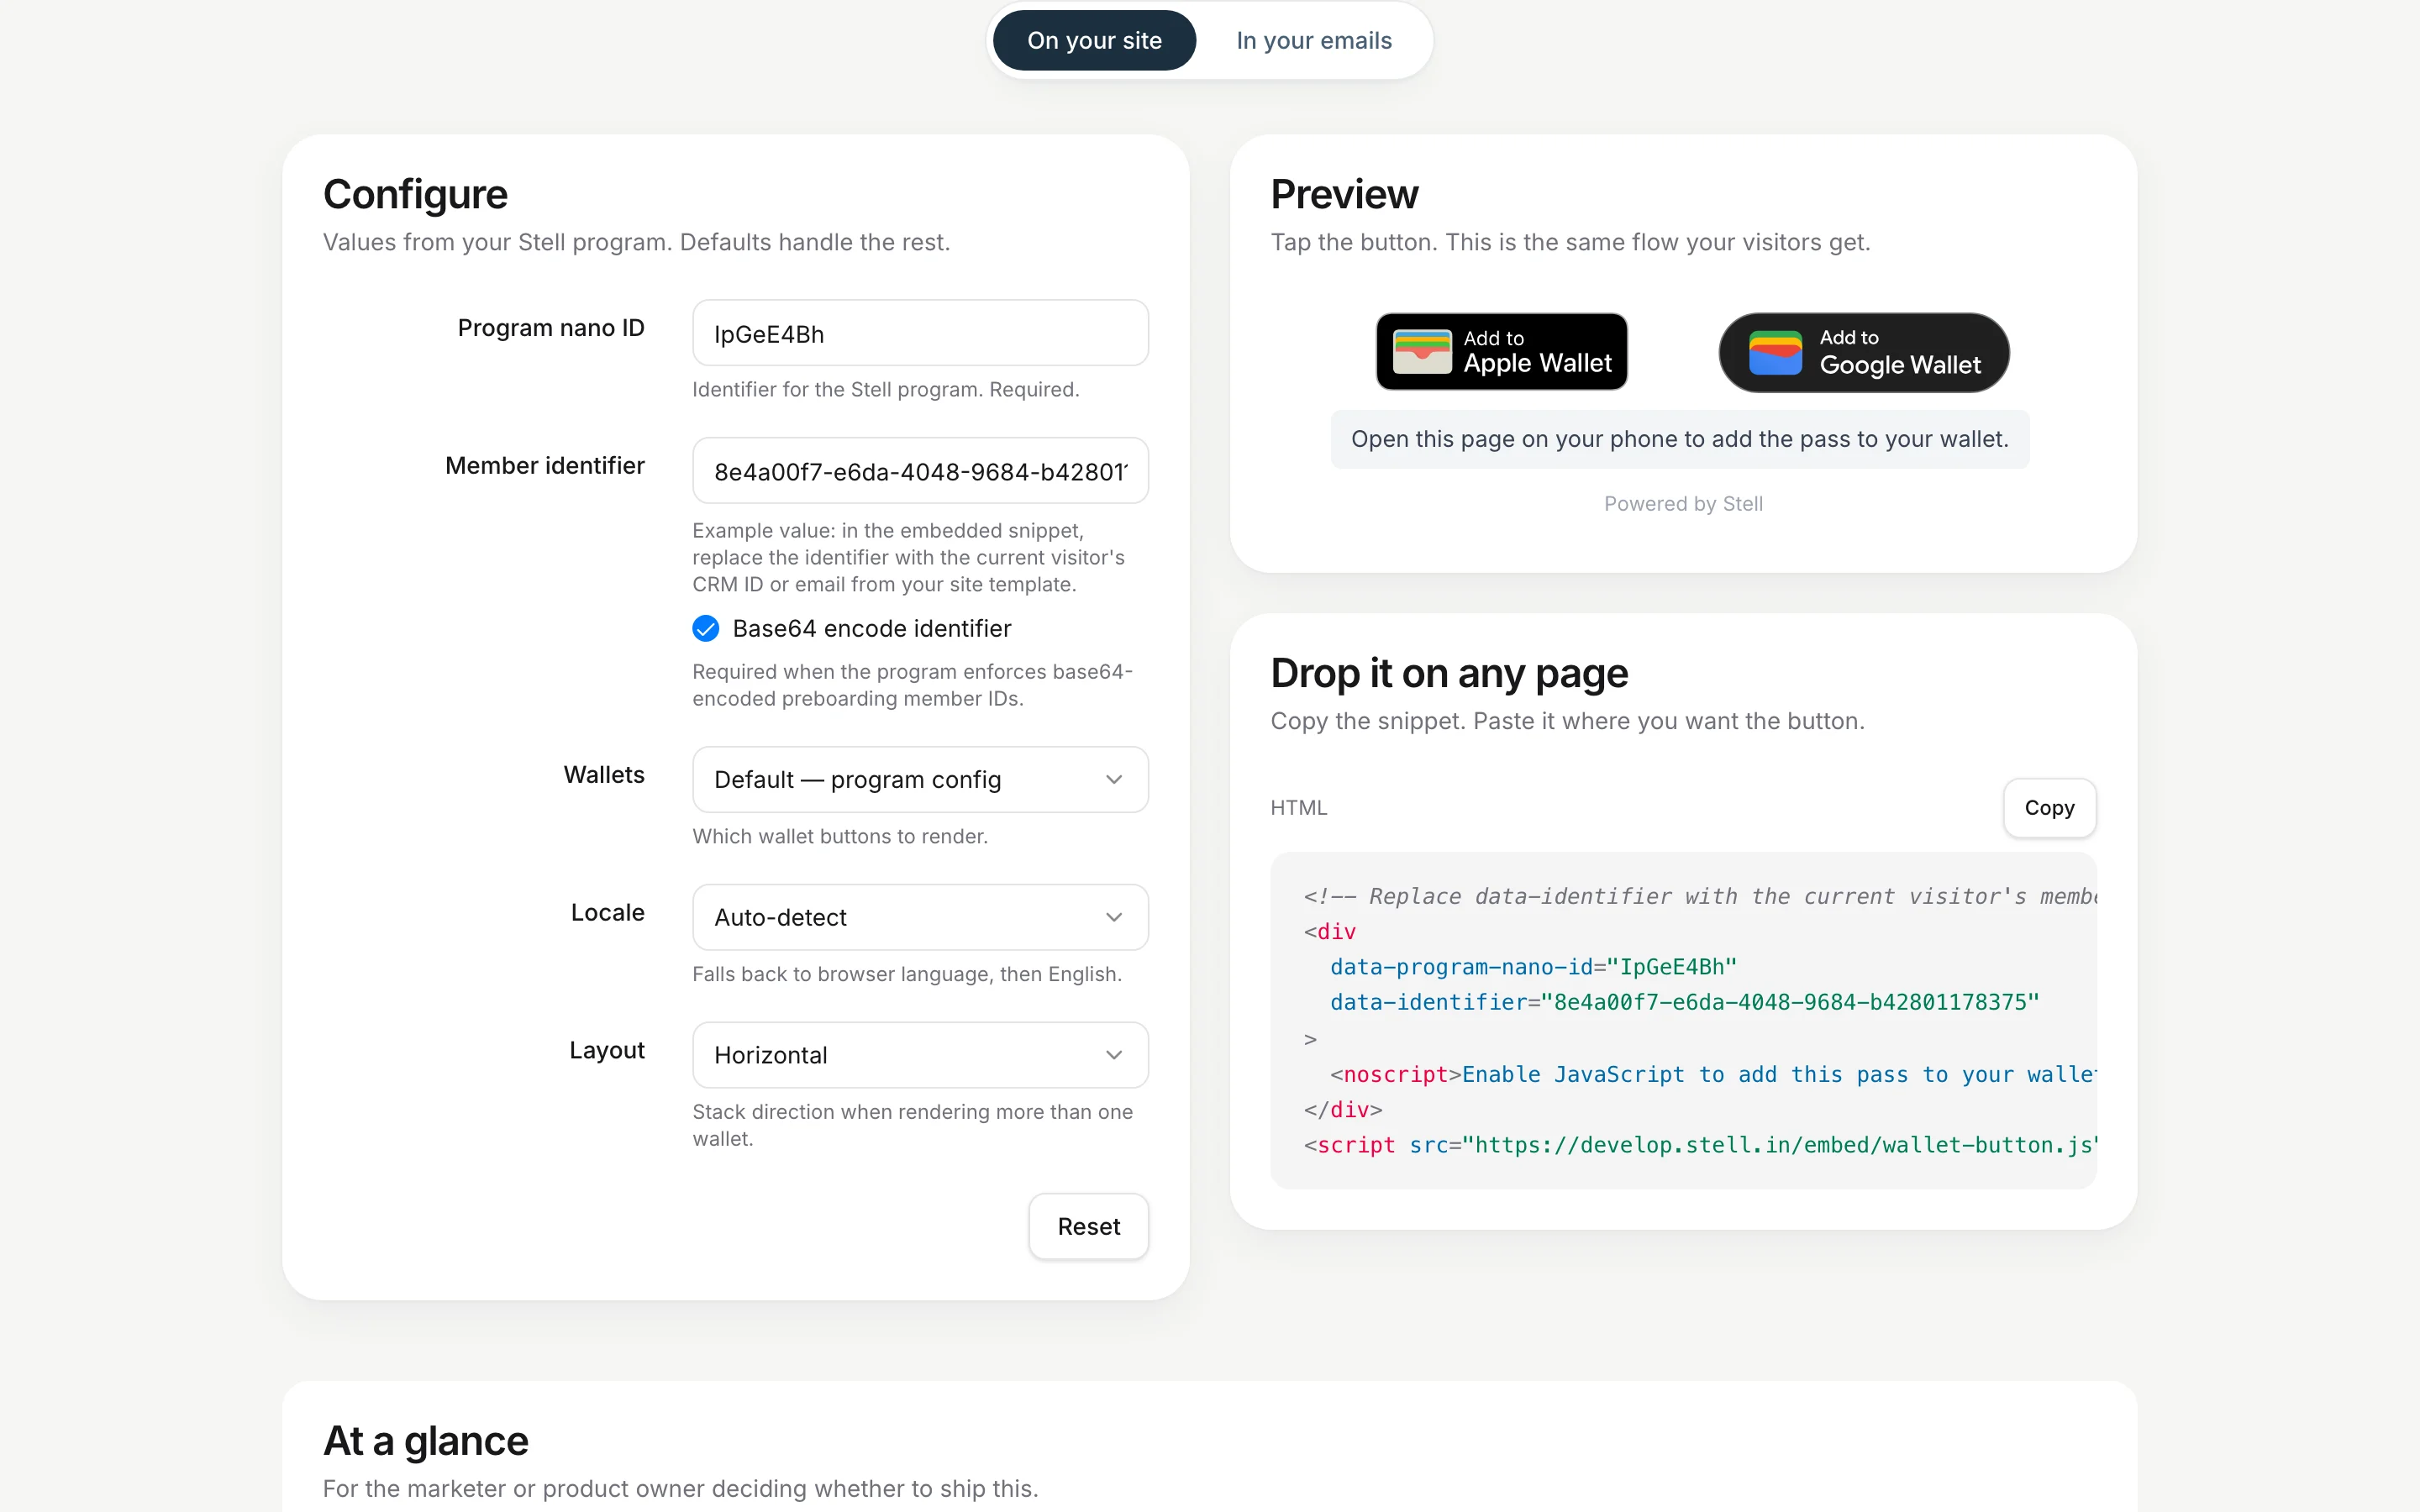
| Option | What it controls |
|---|---|
| Program nano ID | Which program the button issues passes for |
| Member identifier | A test value for the preview — replaced per visitor in production |
| Wallets | Which wallet buttons render — see the options below |
| Locale | The language of the button labels (defaults to the visitor’s browser language) |
| Layout | Whether multiple buttons stack horizontally or vertically |
| Base64 encode identifier | Leave on unless Stell has told you otherwise |
Wallet options
| Setting | What renders on the page |
|---|---|
| Default — program config | A button for every wallet your program supports — both Add to Apple Wallet and Save to Google Wallet if your program offers both. The safe choice for most sites. |
| Apple Wallet | Only the Apple Wallet button, on every device. |
| Google Wallet | Only the Google Wallet button, on every device. |
| Apple + Google | Both buttons, on every device — an Android visitor will also see the Apple Wallet button, and an iPhone visitor the Google Wallet one. |
| Auto — detect device | Picks by the visitor’s device: only the Apple Wallet button on iPhone, only the Google Wallet button on Android, and both on desktop. Use this to avoid showing a button the visitor’s phone can’t use. |
On your site
Configure the button
Open the configurator with your program’s nano ID, enter a test member identifier, and pick wallets, locale, and layout. Check the preview.
Paste it into your page template
Place the snippet where the button should appear — a member page, order confirmation, or account area.
In your emails
The In your emails tab generates wallet links for email templates instead of a script — email clients don’t run JavaScript, so the button is a plain image wrapped in a link.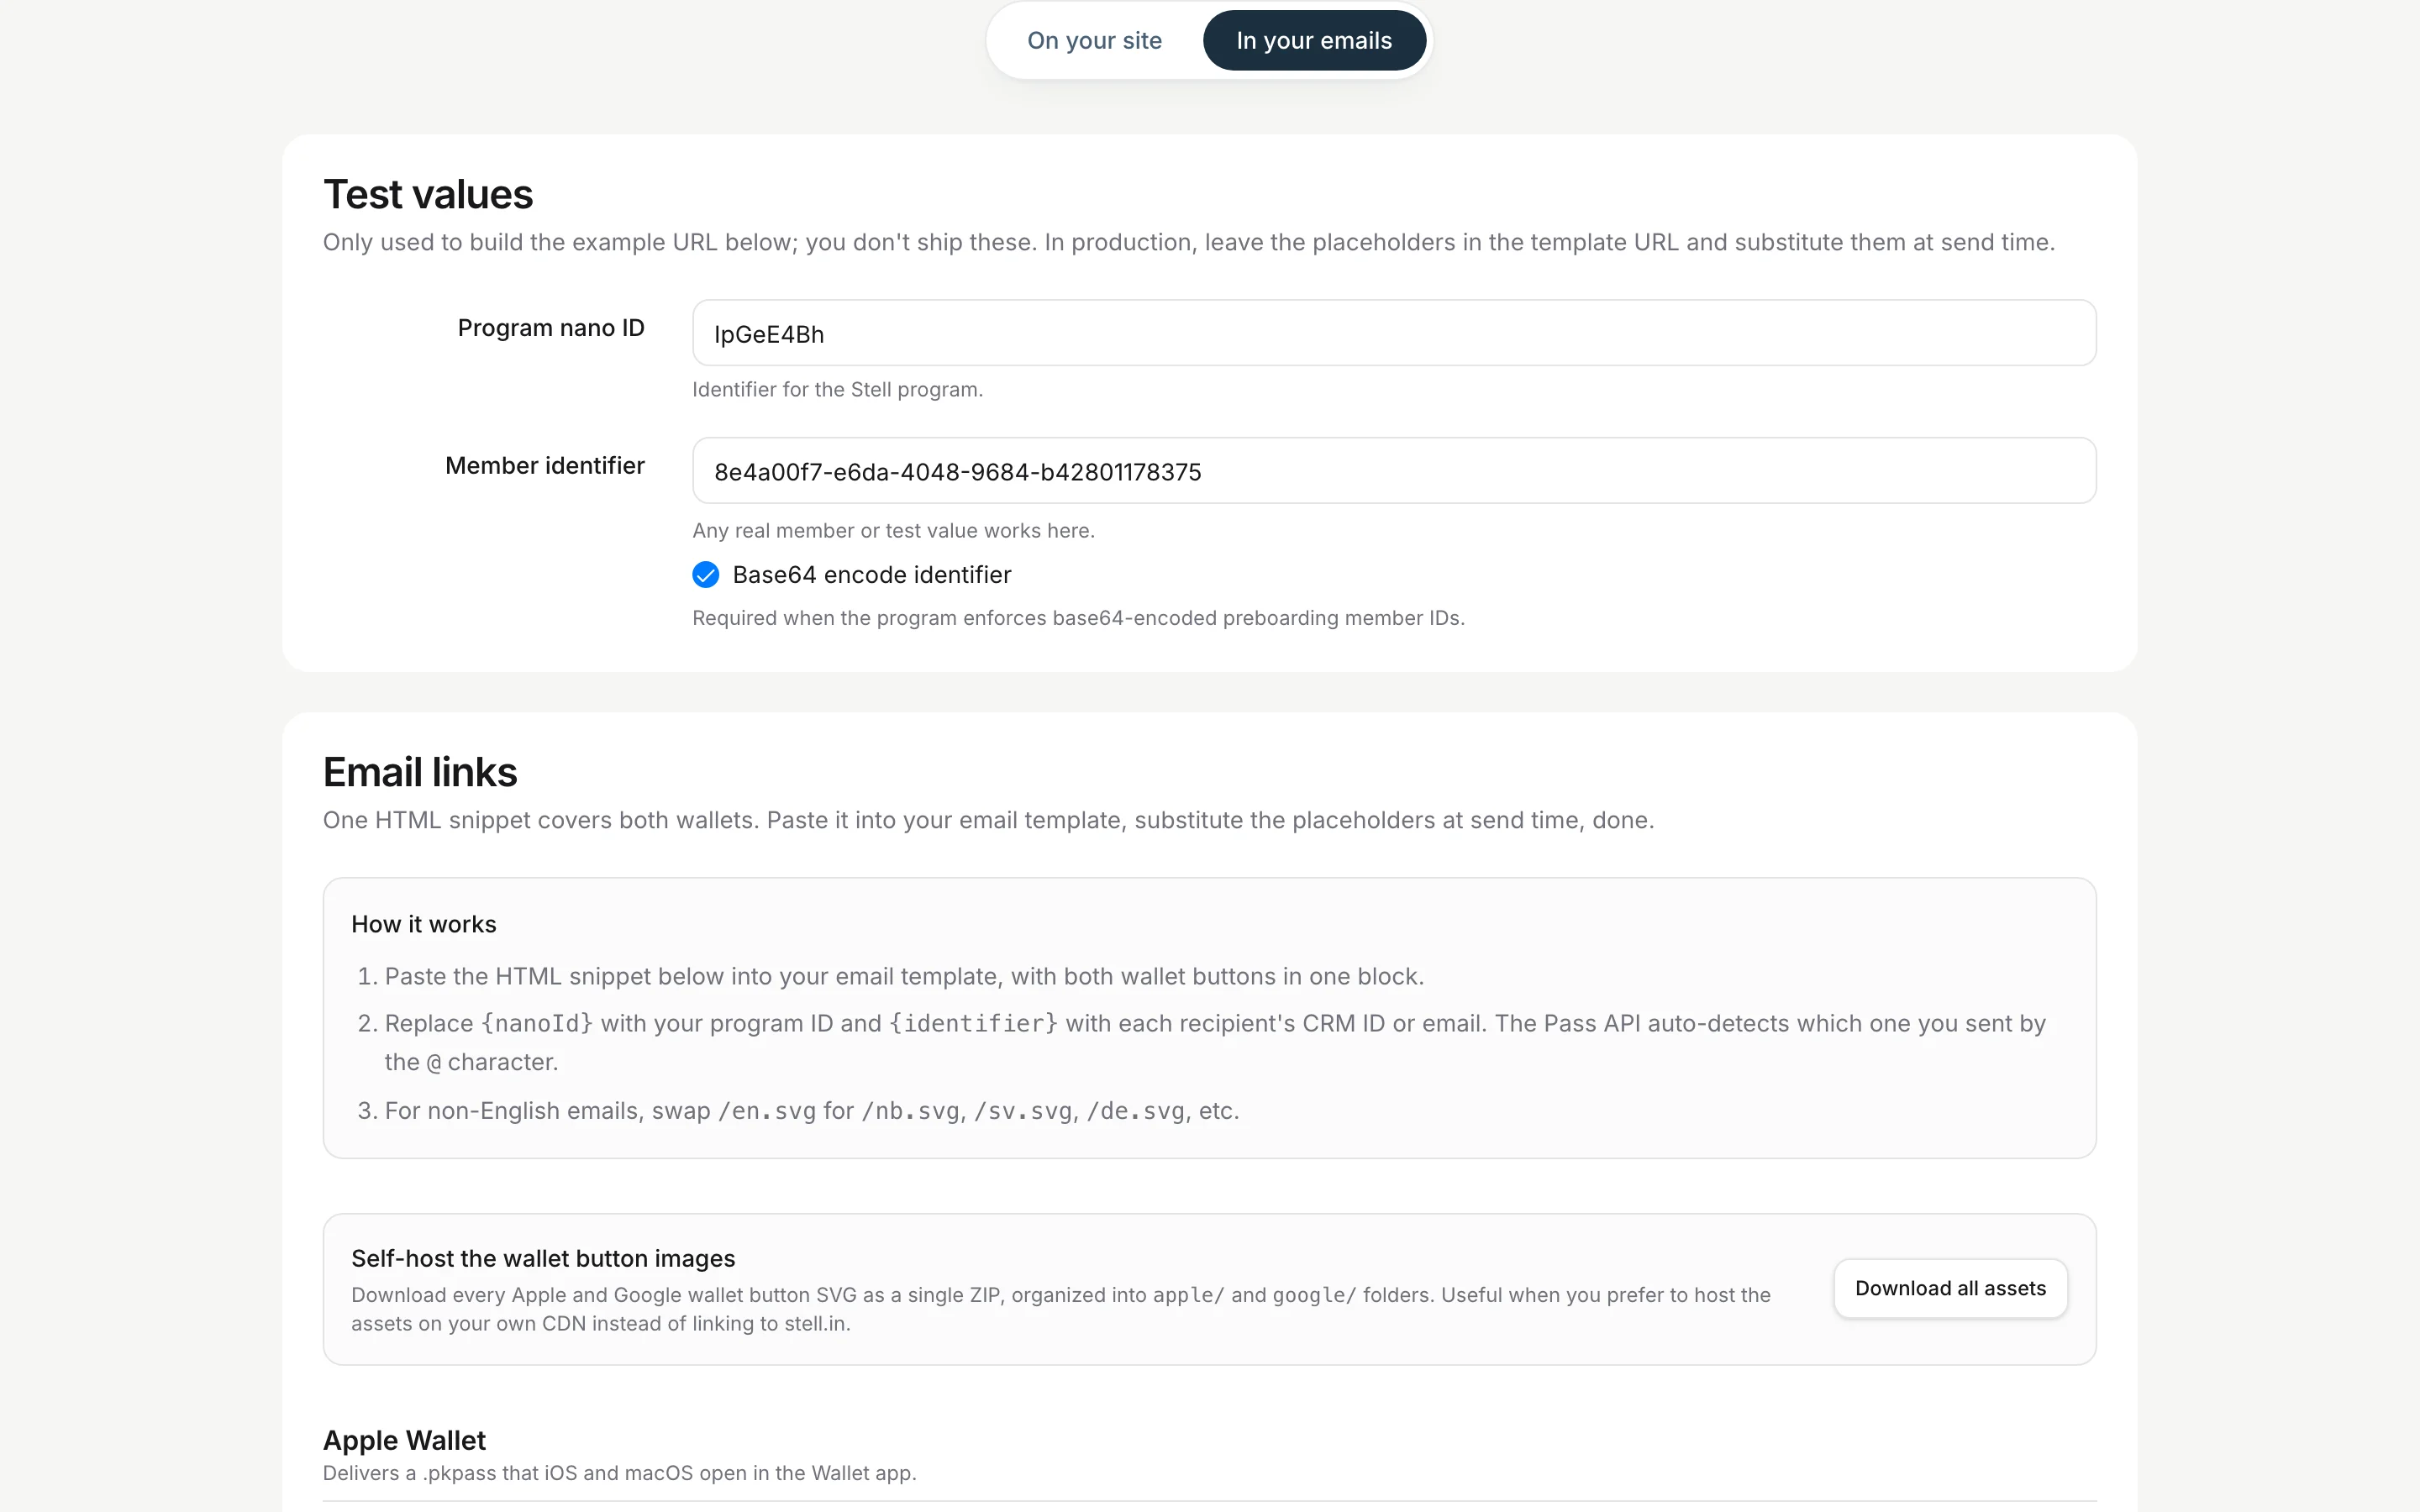
- Paste the HTML snippet from the Email links card into your email template. It contains an Add to Apple Wallet and a Save to Google Wallet button, each linking to a URL template like
https://stell.in/api/pass/{nanoId}/{identifier}?wallet=apple. - At send time, have your email tool replace
{nanoId}with your program’s nano ID and{identifier}with each recipient’s CRM member ID — or their email address; the link works with either. - For non-English emails, swap the button image’s
/en.svgfor the matching language (/nb.svg,/sv.svg,/de.svg, and so on).
Before you launch
- Identifier is per-visitor. Each signed-in visitor or email recipient must get their own identifier — test with at least two different members.
- Test on a real phone. Add a pass to Apple Wallet on an iPhone and Google Wallet on an Android device, not just in a desktop browser.
- Check your Content Security Policy. If your site enforces a strict CSP, allow the Stell origins — the configurator’s guide lists exactly which directives to add.
- Check localization. If your audience isn’t English-speaking, set the locale (or verify auto-detect) and use matching email button images.