

- Pass status changed. Fires each time a pass moves between lifecycle states. The most common use is detecting enrollment: when a customer adds their pass to Apple Wallet or Google Wallet, the pass goes from
PREACTIVEtoACTIVE, and that change fires the webhook. - Pass created. Fires the moment a pass is issued, before the customer has added it to a wallet. Use it to mirror new passes into your own systems no matter where they were issued: the portal, an enrollment page, or the API.
- Transaction created. Fires when a transaction is recorded against a pass, for example an NFC tap at a terminal.
Before you start
- An HTTPS endpoint that can receive POST requests. The URL must be public; plain HTTP, localhost, and private network addresses are rejected.
- Which events you need. For enrollment notifications, Pass status changed is enough.
- Your endpoint’s credentials, if it requires them, for example a bearer token to send in an
Authorizationheader.
Create a subscription
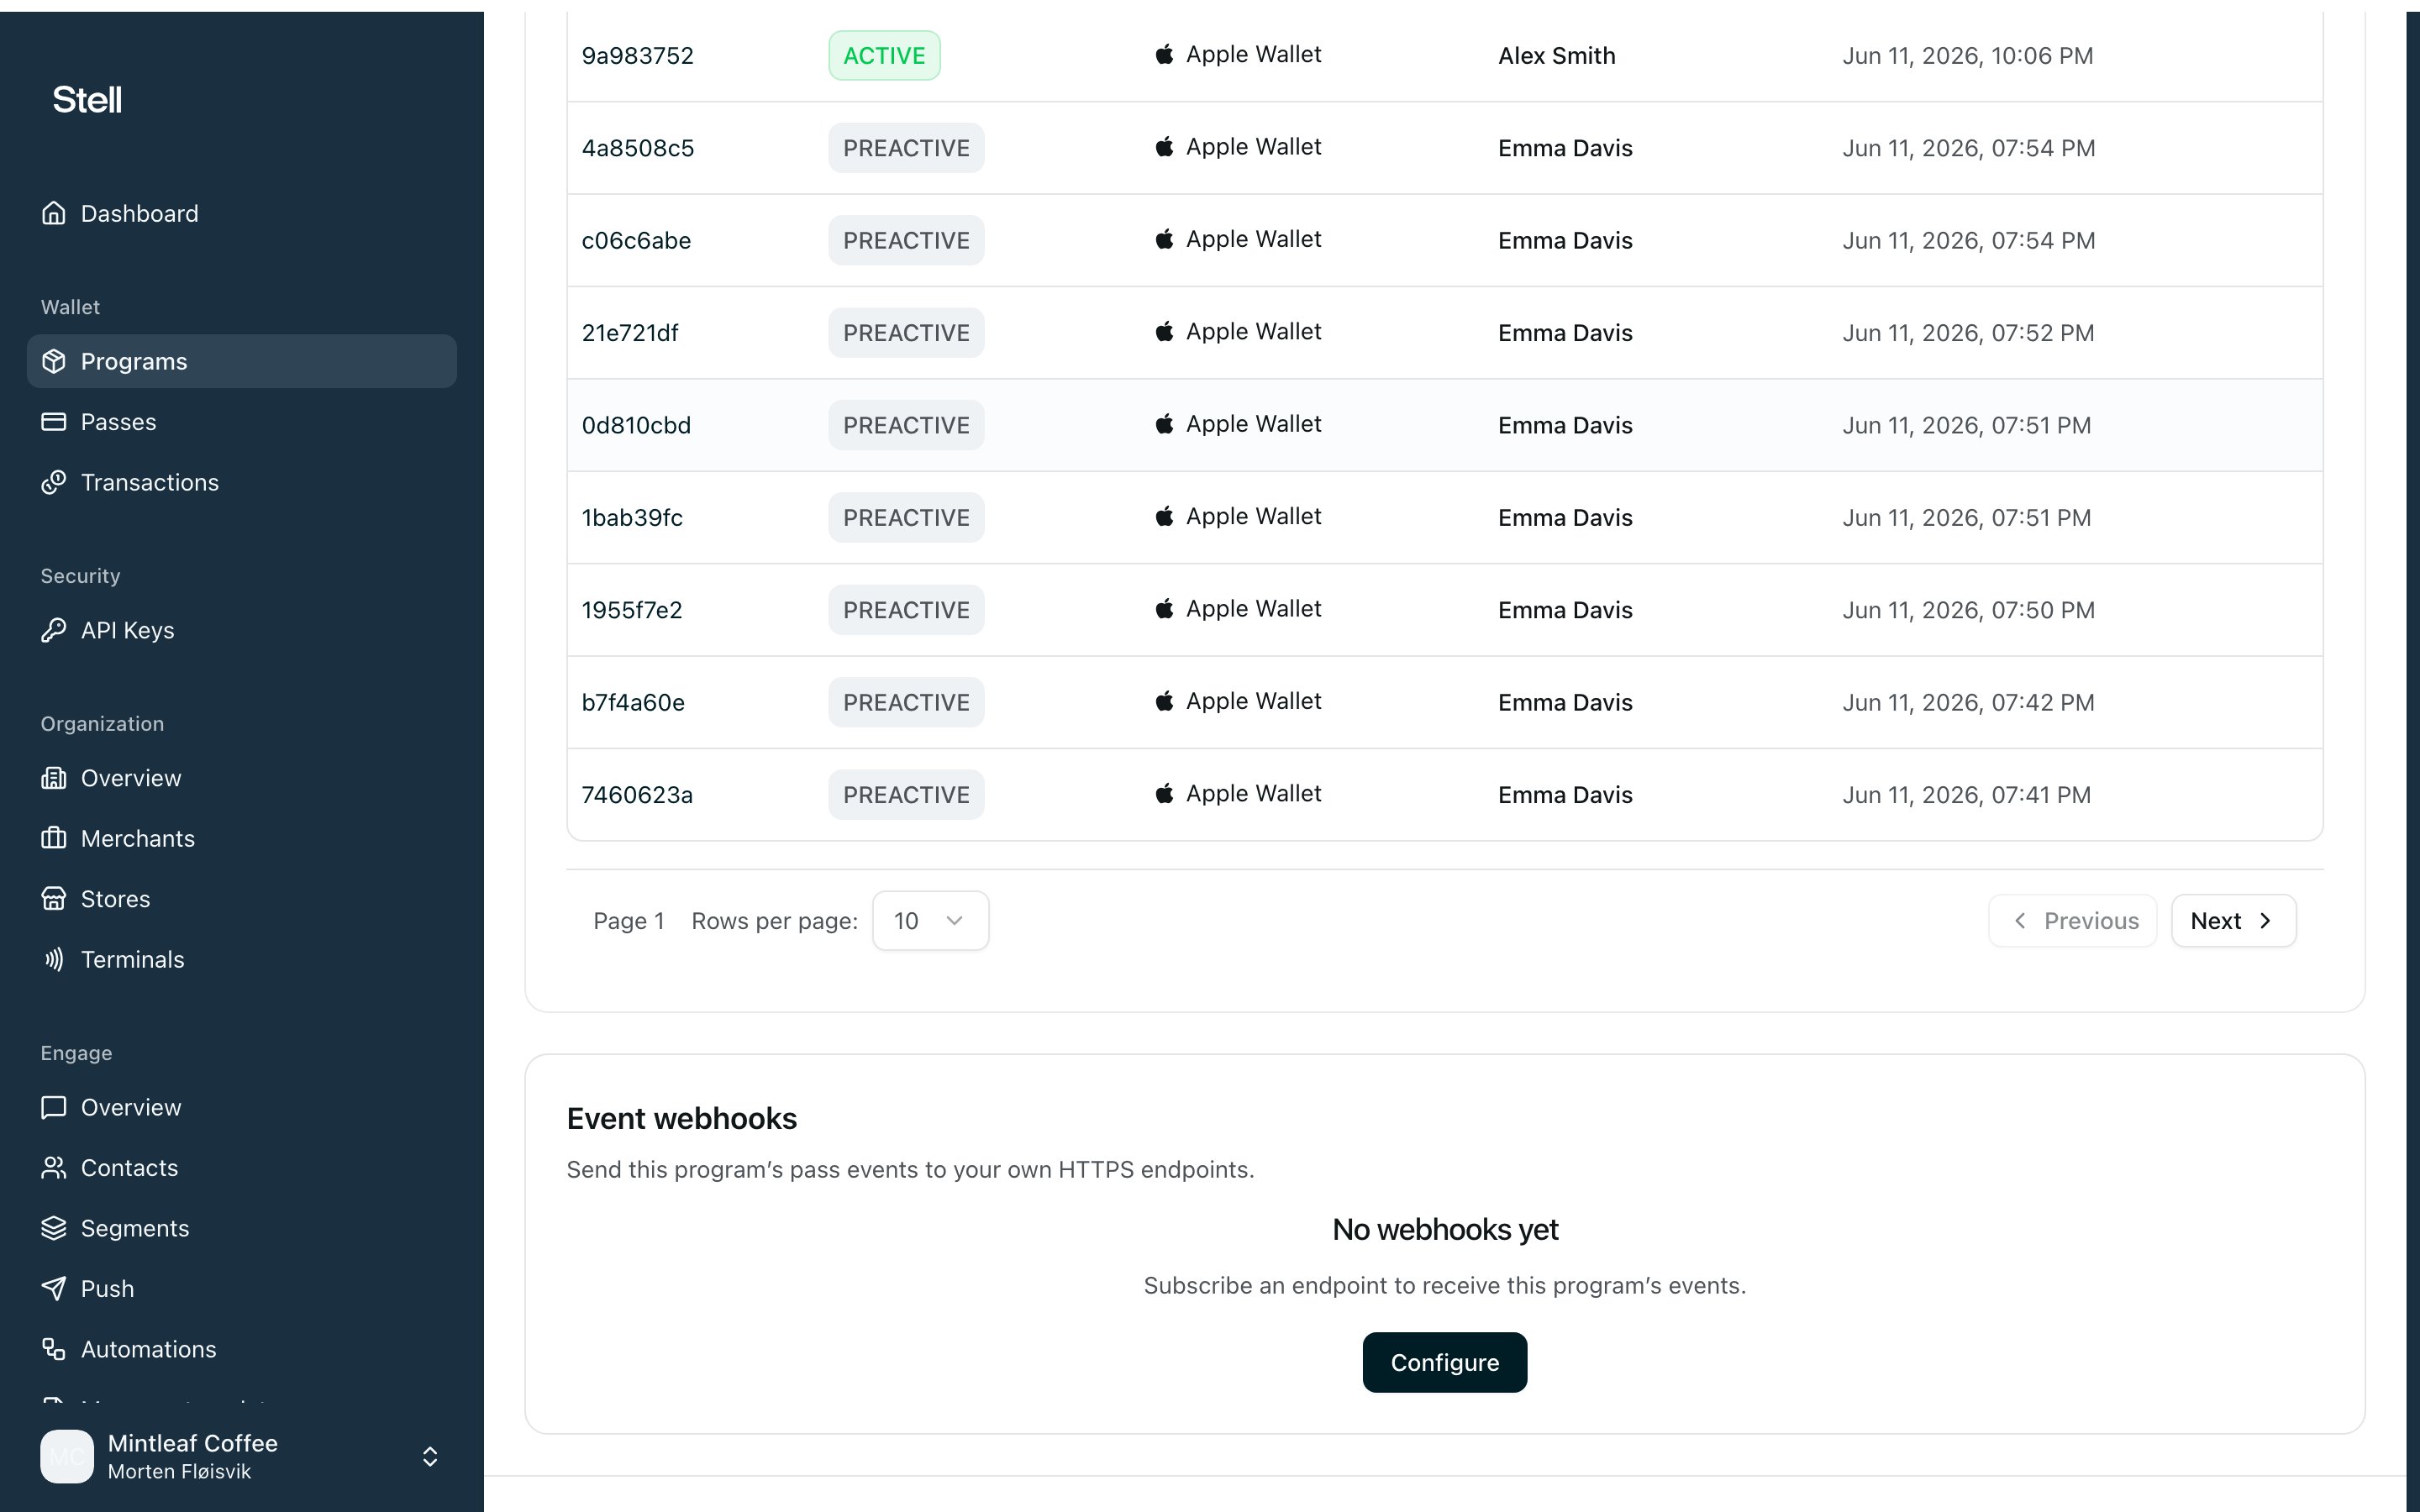
- Open your program and find the Event webhooks card.
- Click Configure (or Manage, if the program already has subscriptions), then Add subscription.
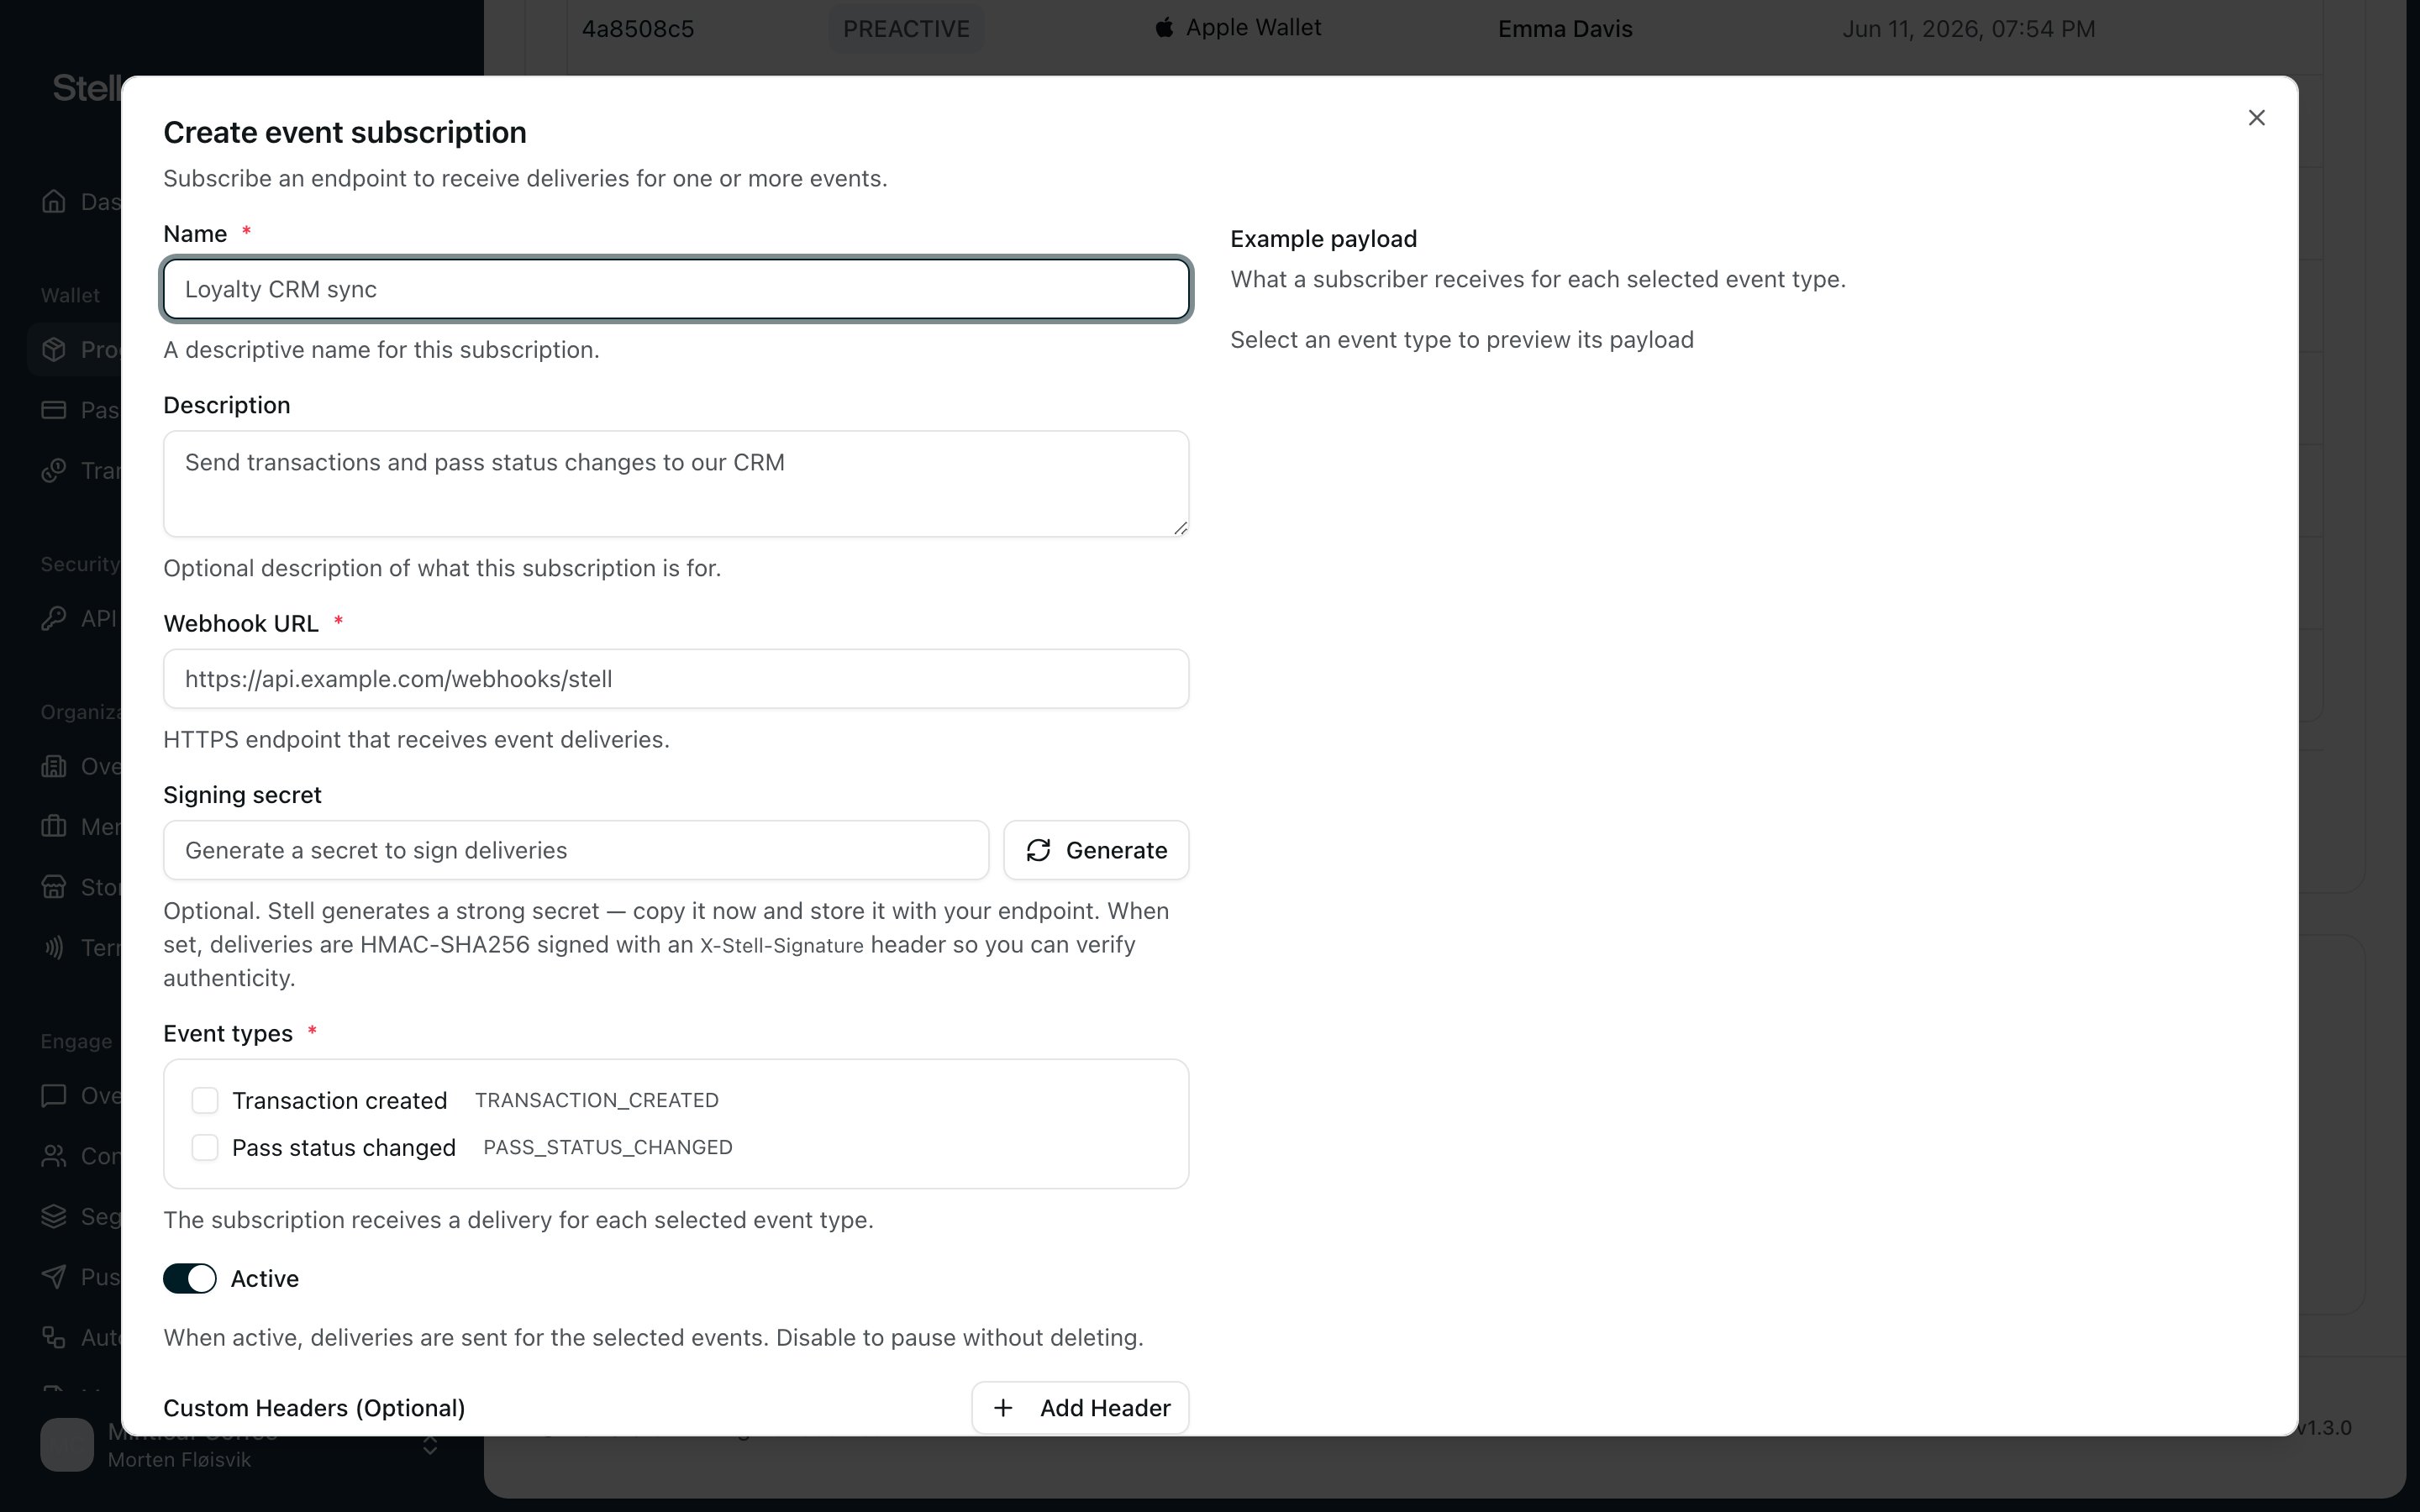
- Give it a Name that says where the events go, for example “Loyalty CRM sync”, and optionally a Description.
- Enter the Webhook URL, the HTTPS endpoint that receives the deliveries.
- Under Signing secret, click Generate, then Copy. Sharing this secret with your endpoint lets it verify that deliveries really come from Stell. This is optional, but recommended.
- Tick the Event types the endpoint should receive. The Example payload panel next to the form shows exactly what your endpoint gets for each selected type.
- Leave Active on.
- If your endpoint requires authentication, add it under Custom Headers, described below.
- Click Create subscription.
Custom headers
Custom headers are sent with every delivery, typically your endpoint’s authentication. Click Add Header and pick a preset:- Authorization, for token auth. Enter the value your endpoint expects, for example
Bearer your-token-here. - X-API-Key, for endpoints keyed by API key.
- Custom, any header of your own, as long as its name starts with
X-.
Authorization and X-* headers are allowed. Headers without a value aren’t saved, and if two headers share a name, only the last value is kept.
Manage subscriptions
Open Manage on the Event webhooks card to see the program’s subscriptions. Each shows its name, event types, and an Active or Inactive badge.- Edit changes anything about the subscription: name, URL, events, secret, headers. The program it belongs to can’t be changed; create a subscription on the other program instead.
- Pause turns off the Active switch in the edit dialog. Deliveries stop, but the configuration is kept for when you switch it back on.
- Delete stops all event deliveries to the endpoint permanently. This can’t be undone.
Test your webhook
There’s no test button. Verify with a real pass instead, which also proves the whole chain:- Issue a pass in the subscribed program, with your own details.
- Add it to your wallet.
- Adding the pass activates it, and that status change fires the webhook within moments. Check that your endpoint received the delivery.
Issuing a pass doesn’t fire Pass status changed. The first delivery of
that type comes when the customer adds the pass to a wallet, and a pass that’s
never added sends none. To catch the issuing moment itself, subscribe to
Pass created.
If deliveries don’t arrive
- Right program? The most common miss: the pass belongs to a different program than the one with the subscription.
- Subscription Active, with the right event type ticked?
- Did a subscribed event actually happen? Issuing a pass fires Pass created but not Pass status changed, which waits for the customer to add the pass to a wallet.
- Does your endpoint answer with a 2xx status? Failed deliveries are retried, then re-driven for up to roughly 24 hours. See retries.
- Expecting a header that isn’t arriving? Only
AuthorizationandX-*custom headers are sent; anything else was dropped when the subscription was saved.