> ## Documentation Index
> Fetch the complete documentation index at: https://docs.getstell.com/llms.txt
> Use this file to discover all available pages before exploring further.
# Promote your program
> Plan the launch of your pass program and keep it growing across email, social media, your website, and your stores
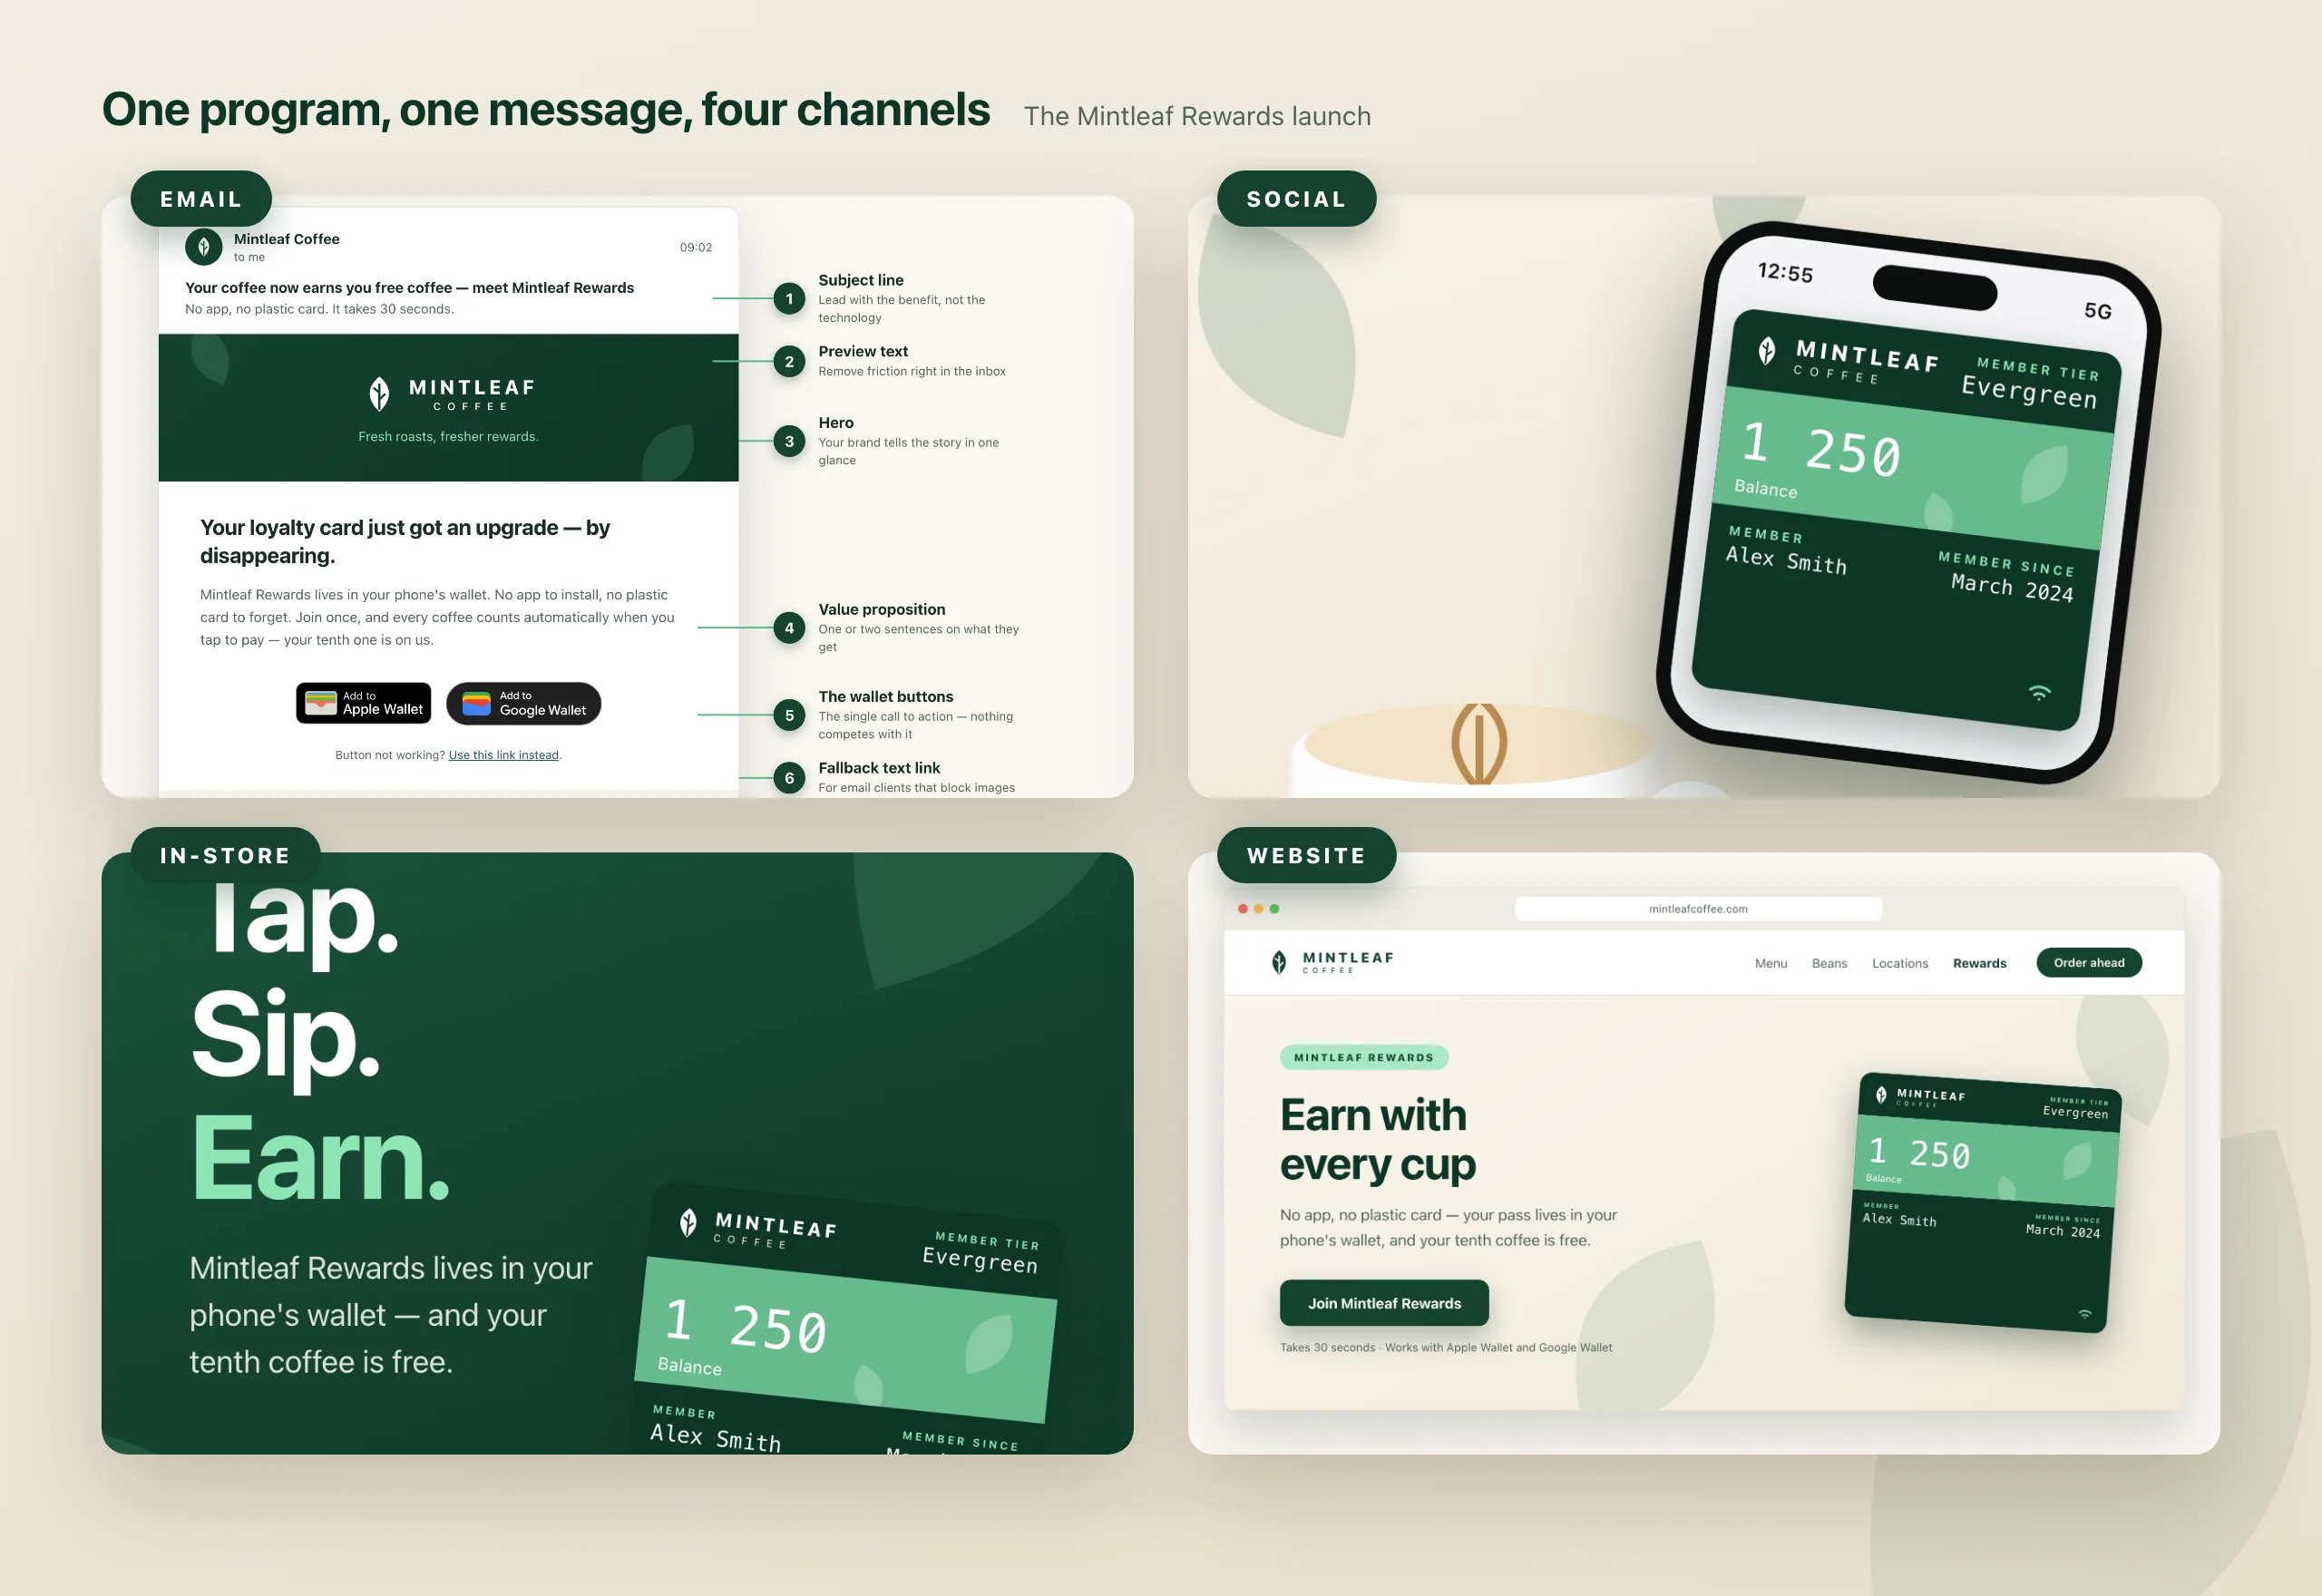
Your program only grows when customers hear about it. This section gives you a launch plan and ready-to-adapt examples for every channel — emails, social media posts, website placements, and in-store material — all illustrated with the **Mintleaf Rewards** demo program.
Whatever the channel, every promotion ends at one of two entry points:
| Entry point | Who it's for | What happens |
| ------------------------------ | -------------------------------------------------------------------------------- | ---------------------------------------------------------------------------------------------------------------------------------------------- |
| **Enrollment link or QR code** | New customers, or anyone you can't identify | The customer fills in the short [enrollment flow](/enrollment/how-enrollment-works) and adds the pass to **Apple Wallet** or **Google Wallet** |
| **Wallet button widget** | Customers already in your systems — signed in on your site or addressed by email | One tap issues their pass directly, no form — see the [wallet button widget](/enrollment/wallet-button-widget) |
Pick the right entry point per channel and the rest is communication.
## The channels
The strongest launch channel — announce the program and give existing customers a one-tap button.
Reach people you can't email, with post ideas for the launch and beyond.
Invite visitors on your public site and put a one-tap button on the signed-in member page.
Posters, counter cards, receipts, and screens — plus what your staff should say.
## A launch plan
A coordinated launch beats trickling the news out. Here's how a week could look for Mintleaf Coffee:
Before any customer hears about the program, have your staff enroll and use their own passes for a few days. They'll find rough edges, and they'll be able to answer customer questions from experience. The [onboarding checklist](/onboarding/checklist) covers the technical side of going live.
Posters, counter cards, and receipt QR codes go up first — the counter is where joining makes the most immediate sense. See [in-store material](/promote/in-store).
Tell your existing customers. Members in your CRM can get a one-tap invitation; everyone else gets the enrollment link. See [email](/promote/email).
Add a banner or program page for new visitors, and the wallet button to the signed-in member page. See [website and my page](/promote/website).
Post the announcement once the other channels are ready, so everyone who clicks can join immediately. See [social media](/promote/social-media).
Promotion isn't a one-week project. Keep the receipt QR printing, rotate ongoing social posts, and brief new staff. Once customers hold the pass, Engage push notifications reach them directly on the lock screen.
If you don't see Engage in your navigation, it isn't enabled for your company — [contact support](/support/contact). Engage reaches customers who already hold your pass; the channels in this section are for reaching everyone who doesn't, yet.
 ## Using the wallet badges
The **Add to Apple Wallet** and **Add to Google Wallet** badges are recognizable — customers know what tapping them means. That recognition only works if the badges look exactly the way Apple and Google designed them, so both providers set rules for their use. The short version:
* **Use the official artwork only.** Never recreate, recolor, crop, stretch, rotate, or animate a badge, and never add shadows or other effects. The easiest way to stay compliant: the wallet button widget renders correct badges for you on the web, and the configurator's **Download all assets** button gives you every official button image as a ZIP for emails — see the [wallet button widget](/enrollment/wallet-button-widget).
* **Keep the badge secondary.** It's the call to action, not the hero — your program and brand carry the message, the badge closes it. Don't let it dominate the layout, and don't place text or graphics over it.
* **Give it room.** Leave clear space around the badge — as a rule of thumb, at least a tenth of the badge's height on every side.
* **Match the format to the medium.** Vector files (SVG) for web and email; print-quality vector files (EPS) for anything printed. Never print a screenshot of a badge.
* **In print, pair the badge with a QR code.** Paper can't be tapped — the badge signals what the customer gets, the QR code is how they get it, and a short scanning instruction bridges the two. See [in-store material](/promote/in-store).
Never design your own version of a wallet badge — not even "just matching our brand colors". Altered badges break the providers' trademark rules and customers trust them less.
The full rules live with the providers: Apple's [Add to Apple Wallet guidelines](https://developer.apple.com/wallet/add-to-apple-wallet-guidelines/) and Google's [Google Wallet brand guidelines](https://developers.google.com/wallet/generic/resources/brand-guidelines). Downloading badge artwork directly from Apple requires accepting Apple's wallet marketing agreement, and your communications remain your responsibility under both providers' trademark rules — when in doubt, check their pages, which always reflect the current requirements.
## Watch it work
You'll see promotion working in the portal: newly issued passes appear in [Passes](/passes/overview), and once customers start using them, every tap or scan shows up in the [Transaction Log](/transactions/overview).
## Using the wallet badges
The **Add to Apple Wallet** and **Add to Google Wallet** badges are recognizable — customers know what tapping them means. That recognition only works if the badges look exactly the way Apple and Google designed them, so both providers set rules for their use. The short version:
* **Use the official artwork only.** Never recreate, recolor, crop, stretch, rotate, or animate a badge, and never add shadows or other effects. The easiest way to stay compliant: the wallet button widget renders correct badges for you on the web, and the configurator's **Download all assets** button gives you every official button image as a ZIP for emails — see the [wallet button widget](/enrollment/wallet-button-widget).
* **Keep the badge secondary.** It's the call to action, not the hero — your program and brand carry the message, the badge closes it. Don't let it dominate the layout, and don't place text or graphics over it.
* **Give it room.** Leave clear space around the badge — as a rule of thumb, at least a tenth of the badge's height on every side.
* **Match the format to the medium.** Vector files (SVG) for web and email; print-quality vector files (EPS) for anything printed. Never print a screenshot of a badge.
* **In print, pair the badge with a QR code.** Paper can't be tapped — the badge signals what the customer gets, the QR code is how they get it, and a short scanning instruction bridges the two. See [in-store material](/promote/in-store).
Never design your own version of a wallet badge — not even "just matching our brand colors". Altered badges break the providers' trademark rules and customers trust them less.
The full rules live with the providers: Apple's [Add to Apple Wallet guidelines](https://developer.apple.com/wallet/add-to-apple-wallet-guidelines/) and Google's [Google Wallet brand guidelines](https://developers.google.com/wallet/generic/resources/brand-guidelines). Downloading badge artwork directly from Apple requires accepting Apple's wallet marketing agreement, and your communications remain your responsibility under both providers' trademark rules — when in doubt, check their pages, which always reflect the current requirements.
## Watch it work
You'll see promotion working in the portal: newly issued passes appear in [Passes](/passes/overview), and once customers start using them, every tap or scan shows up in the [Transaction Log](/transactions/overview).