> ## Documentation Index
> Fetch the complete documentation index at: https://docs.getstell.com/llms.txt
> Use this file to discover all available pages before exploring further.
# Images
> Every image slot on the pass, its dimensions, and when it's shown
Images do most of the visual work on a pass. Each slot has a fixed place and recommended dimensions — using the right size keeps the pass crisp on every device. Upload and replace images in the **Design** tab of the [template editor](/pass-templates/overview), or click the image directly in the preview.
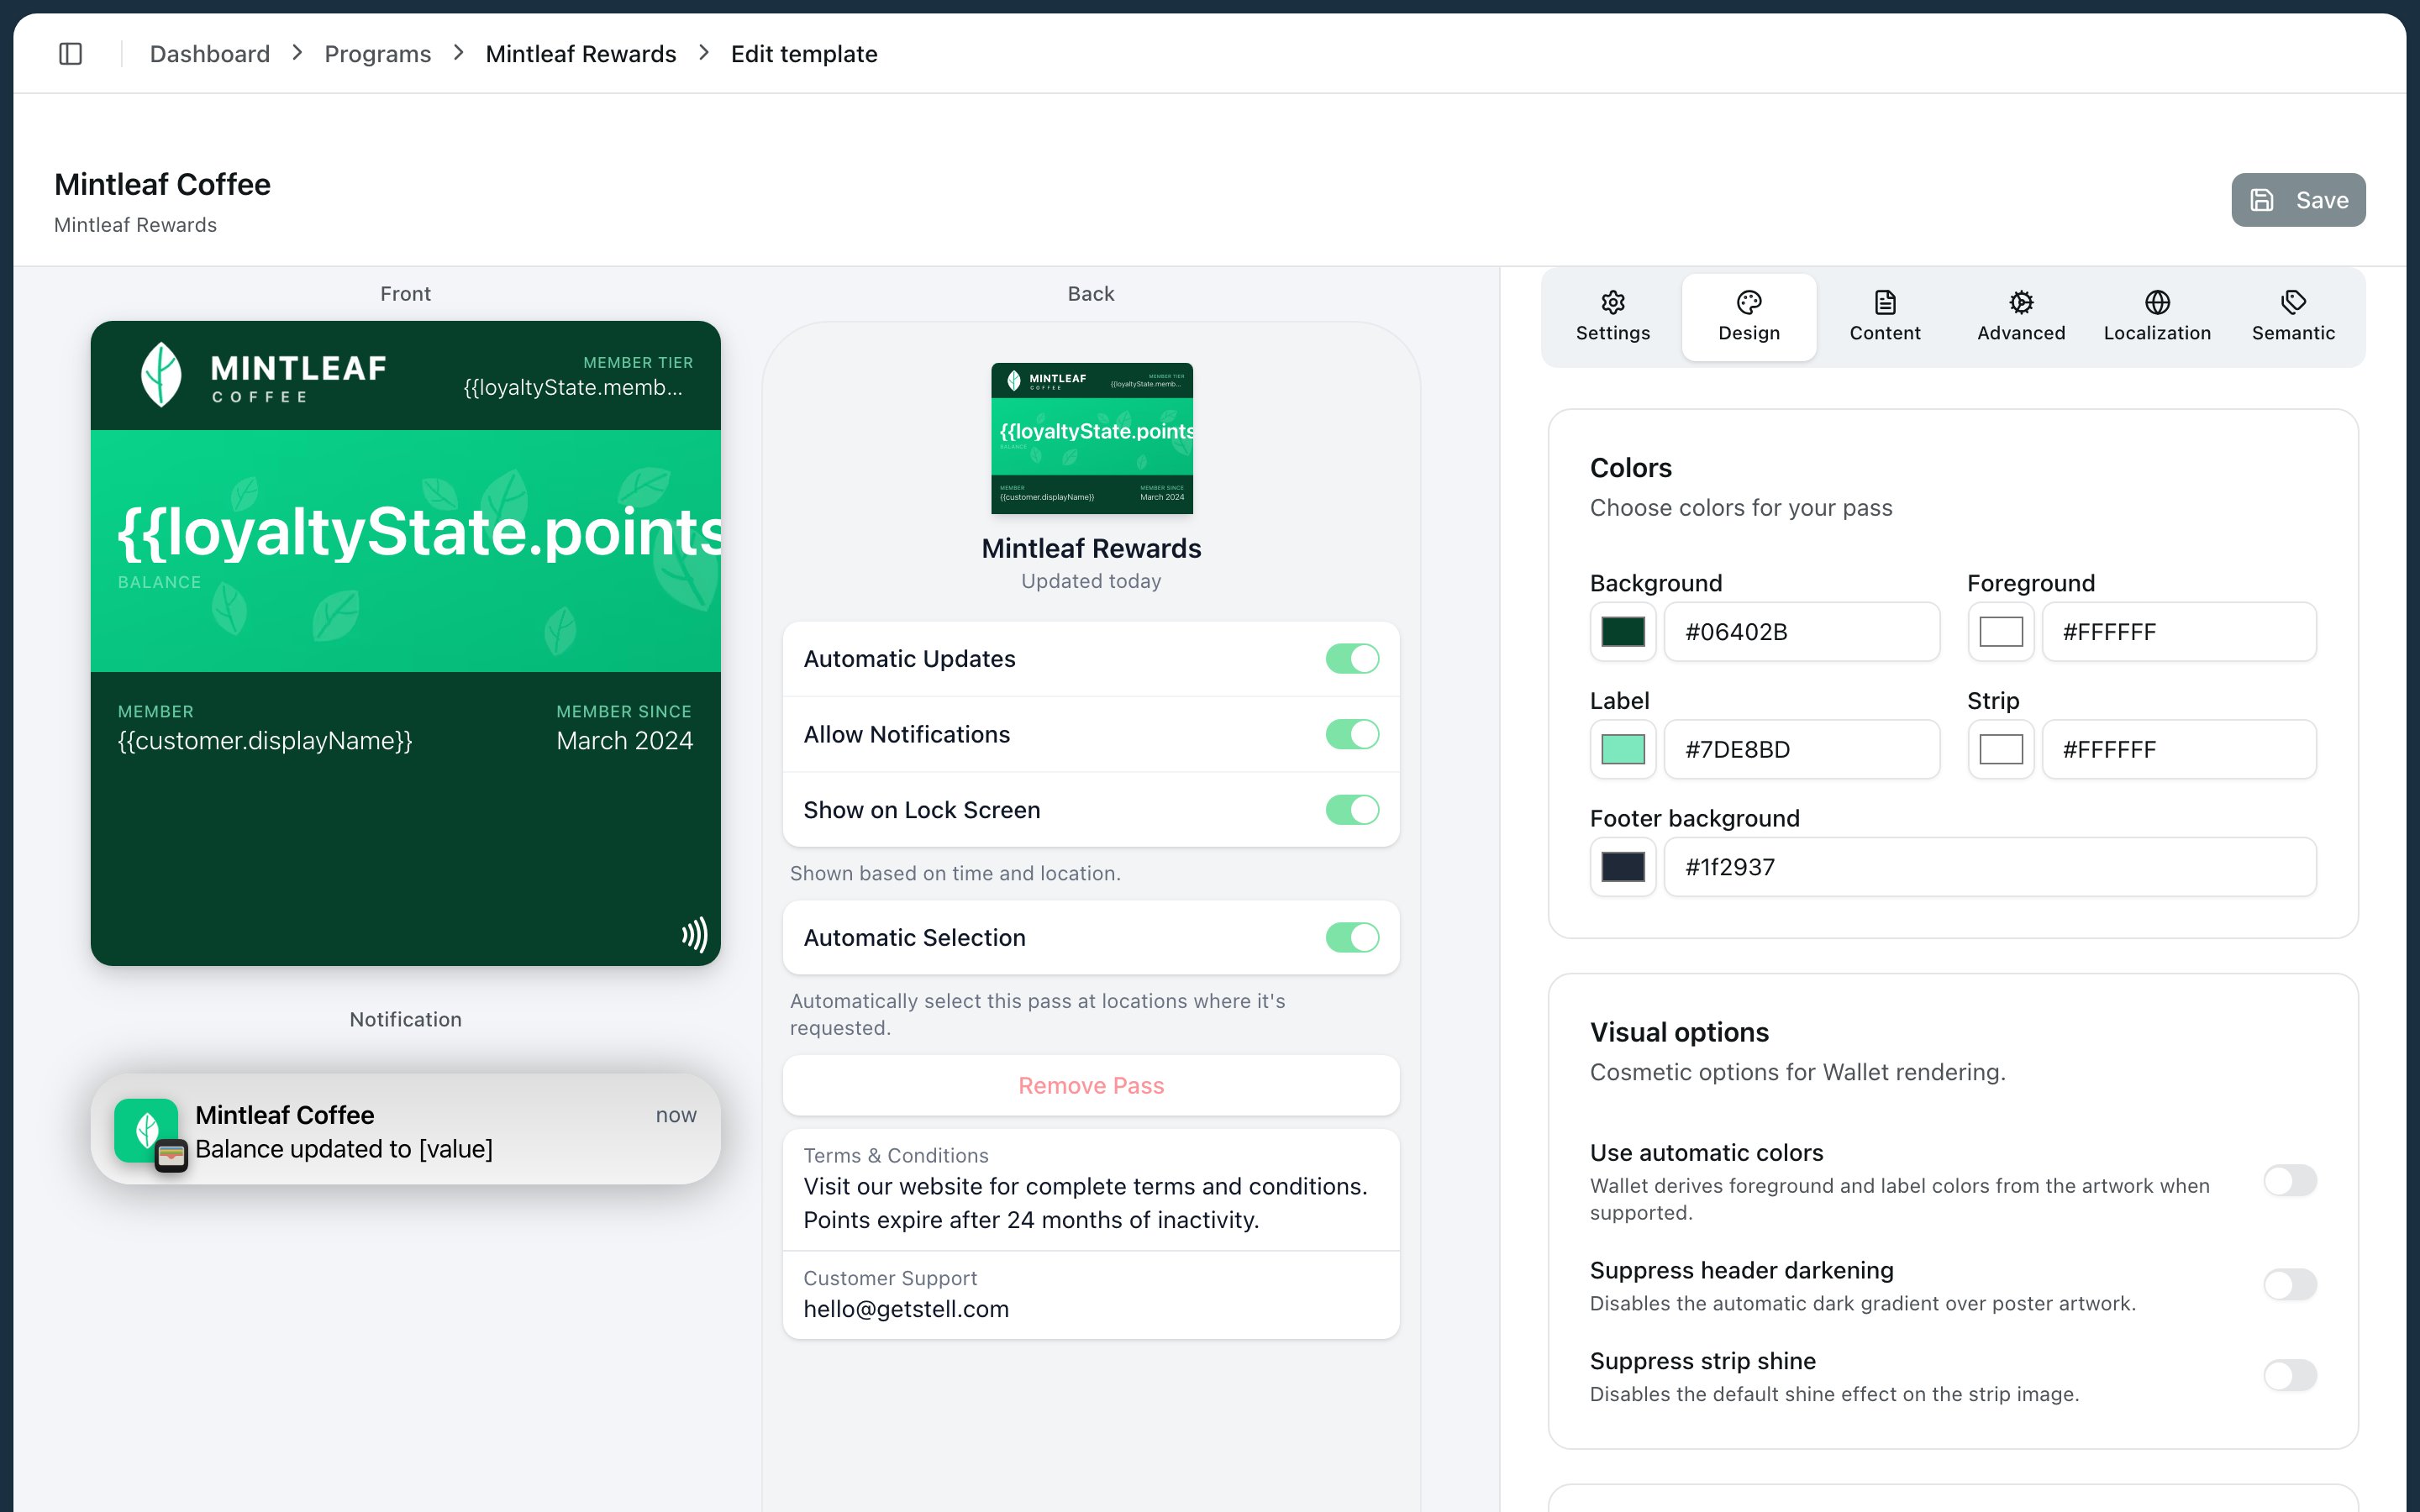 The Design tab also holds the pass **colors** — background, foreground (value text), label, strip, and footer background — plus visual options like automatic colors derived from your artwork.
## Standard images
| Image | Dimensions | Where it appears |
| --------------------------- | ----------------- | ------------------------------------------------------------------------------------------------------------------------------------------------------------------------------------------------------------- |
| **Logo** | up to 160 × 50 px | Top-left corner of the pass front. Aspect ratio is preserved |
| **Strip Image** | 375 × 98 px | The banner across the upper front — on Store Card, Coupon, and Event Ticket styles. The primary field renders on top of it |
| **Pre-install Strip Image** | 375 × 98 px | Replaces the strip image while the pass isn't installed on any device yet — useful for an arrow pointing at the **Add to Apple Wallet** button. Once the customer adds the pass, the regular strip takes over |
| **Background** | 375 × 530 px | Fills the entire pass — on Generic, Event Ticket, and Boarding Pass styles |
| **Icon** | 29 × 29 px | Next to push notifications from this pass on the lock screen — not on the pass itself |
| **Thumbnail** | 90 × 90 px | A square image on the front — Event Ticket style only |
| **Footer** | 286 × 15 px | A slim image just above the barcode |
The **Pre-install Strip Image** is an easy win for enrollment conversion: customers who see the pass before adding it get a visual nudge toward the add-to-wallet button.
## Poster images
Newer iPhones can show Event Ticket passes (iOS 18 and later) and Generic passes (iOS 27 and later) in a richer **poster layout** — see the poster tabs under [layout by style](/pass-templates/anatomy#layout-by-style) for how they rearrange the pass. On older iOS versions the same template falls back to the style's standard layout. These slots appear for those styles:
| Image | Dimensions | Role |
| ------------------ | ------------- | ------------------------------------------------------------------------- |
| **Artwork** | 358 × 448 pt | The poster's main visual — uploading it is what enables the poster layout |
| **Primary Logo** | 126 × 30 pt | Branding on the poster — falls back to your regular Logo if not set |
| **Secondary Logo** | 135 × 12 pt | Smaller secondary branding on the poster |
| **Venue Map** | original size | A seating or venue map for events |
On older devices the pass falls back to the standard layout, so keep the regular images in good shape too.
## Practical tips
* Upload PNG or JPG. For photos use JPG; for logos and graphics with transparency use PNG.
* Design for the exact pixel sizes above at 2× or 3× resolution if you have it — the wallet scales down better than up.
* The strip image sits **behind** the primary field text. Keep the area where the text lands calm and high-contrast, or the value becomes unreadable.
* Remember that which images show depends on the pass style — see [anatomy of a pass](/pass-templates/anatomy). A background image uploaded on a Store Card template won't appear.
* Google Wallet doesn't use the strip image — see [Apple Wallet vs Google Wallet](/pass-templates/apple-vs-google).
The Design tab also holds the pass **colors** — background, foreground (value text), label, strip, and footer background — plus visual options like automatic colors derived from your artwork.
## Standard images
| Image | Dimensions | Where it appears |
| --------------------------- | ----------------- | ------------------------------------------------------------------------------------------------------------------------------------------------------------------------------------------------------------- |
| **Logo** | up to 160 × 50 px | Top-left corner of the pass front. Aspect ratio is preserved |
| **Strip Image** | 375 × 98 px | The banner across the upper front — on Store Card, Coupon, and Event Ticket styles. The primary field renders on top of it |
| **Pre-install Strip Image** | 375 × 98 px | Replaces the strip image while the pass isn't installed on any device yet — useful for an arrow pointing at the **Add to Apple Wallet** button. Once the customer adds the pass, the regular strip takes over |
| **Background** | 375 × 530 px | Fills the entire pass — on Generic, Event Ticket, and Boarding Pass styles |
| **Icon** | 29 × 29 px | Next to push notifications from this pass on the lock screen — not on the pass itself |
| **Thumbnail** | 90 × 90 px | A square image on the front — Event Ticket style only |
| **Footer** | 286 × 15 px | A slim image just above the barcode |
The **Pre-install Strip Image** is an easy win for enrollment conversion: customers who see the pass before adding it get a visual nudge toward the add-to-wallet button.
## Poster images
Newer iPhones can show Event Ticket passes (iOS 18 and later) and Generic passes (iOS 27 and later) in a richer **poster layout** — see the poster tabs under [layout by style](/pass-templates/anatomy#layout-by-style) for how they rearrange the pass. On older iOS versions the same template falls back to the style's standard layout. These slots appear for those styles:
| Image | Dimensions | Role |
| ------------------ | ------------- | ------------------------------------------------------------------------- |
| **Artwork** | 358 × 448 pt | The poster's main visual — uploading it is what enables the poster layout |
| **Primary Logo** | 126 × 30 pt | Branding on the poster — falls back to your regular Logo if not set |
| **Secondary Logo** | 135 × 12 pt | Smaller secondary branding on the poster |
| **Venue Map** | original size | A seating or venue map for events |
On older devices the pass falls back to the standard layout, so keep the regular images in good shape too.
## Practical tips
* Upload PNG or JPG. For photos use JPG; for logos and graphics with transparency use PNG.
* Design for the exact pixel sizes above at 2× or 3× resolution if you have it — the wallet scales down better than up.
* The strip image sits **behind** the primary field text. Keep the area where the text lands calm and high-contrast, or the value becomes unreadable.
* Remember that which images show depends on the pass style — see [anatomy of a pass](/pass-templates/anatomy). A background image uploaded on a Store Card template won't appear.
* Google Wallet doesn't use the strip image — see [Apple Wallet vs Google Wallet](/pass-templates/apple-vs-google).