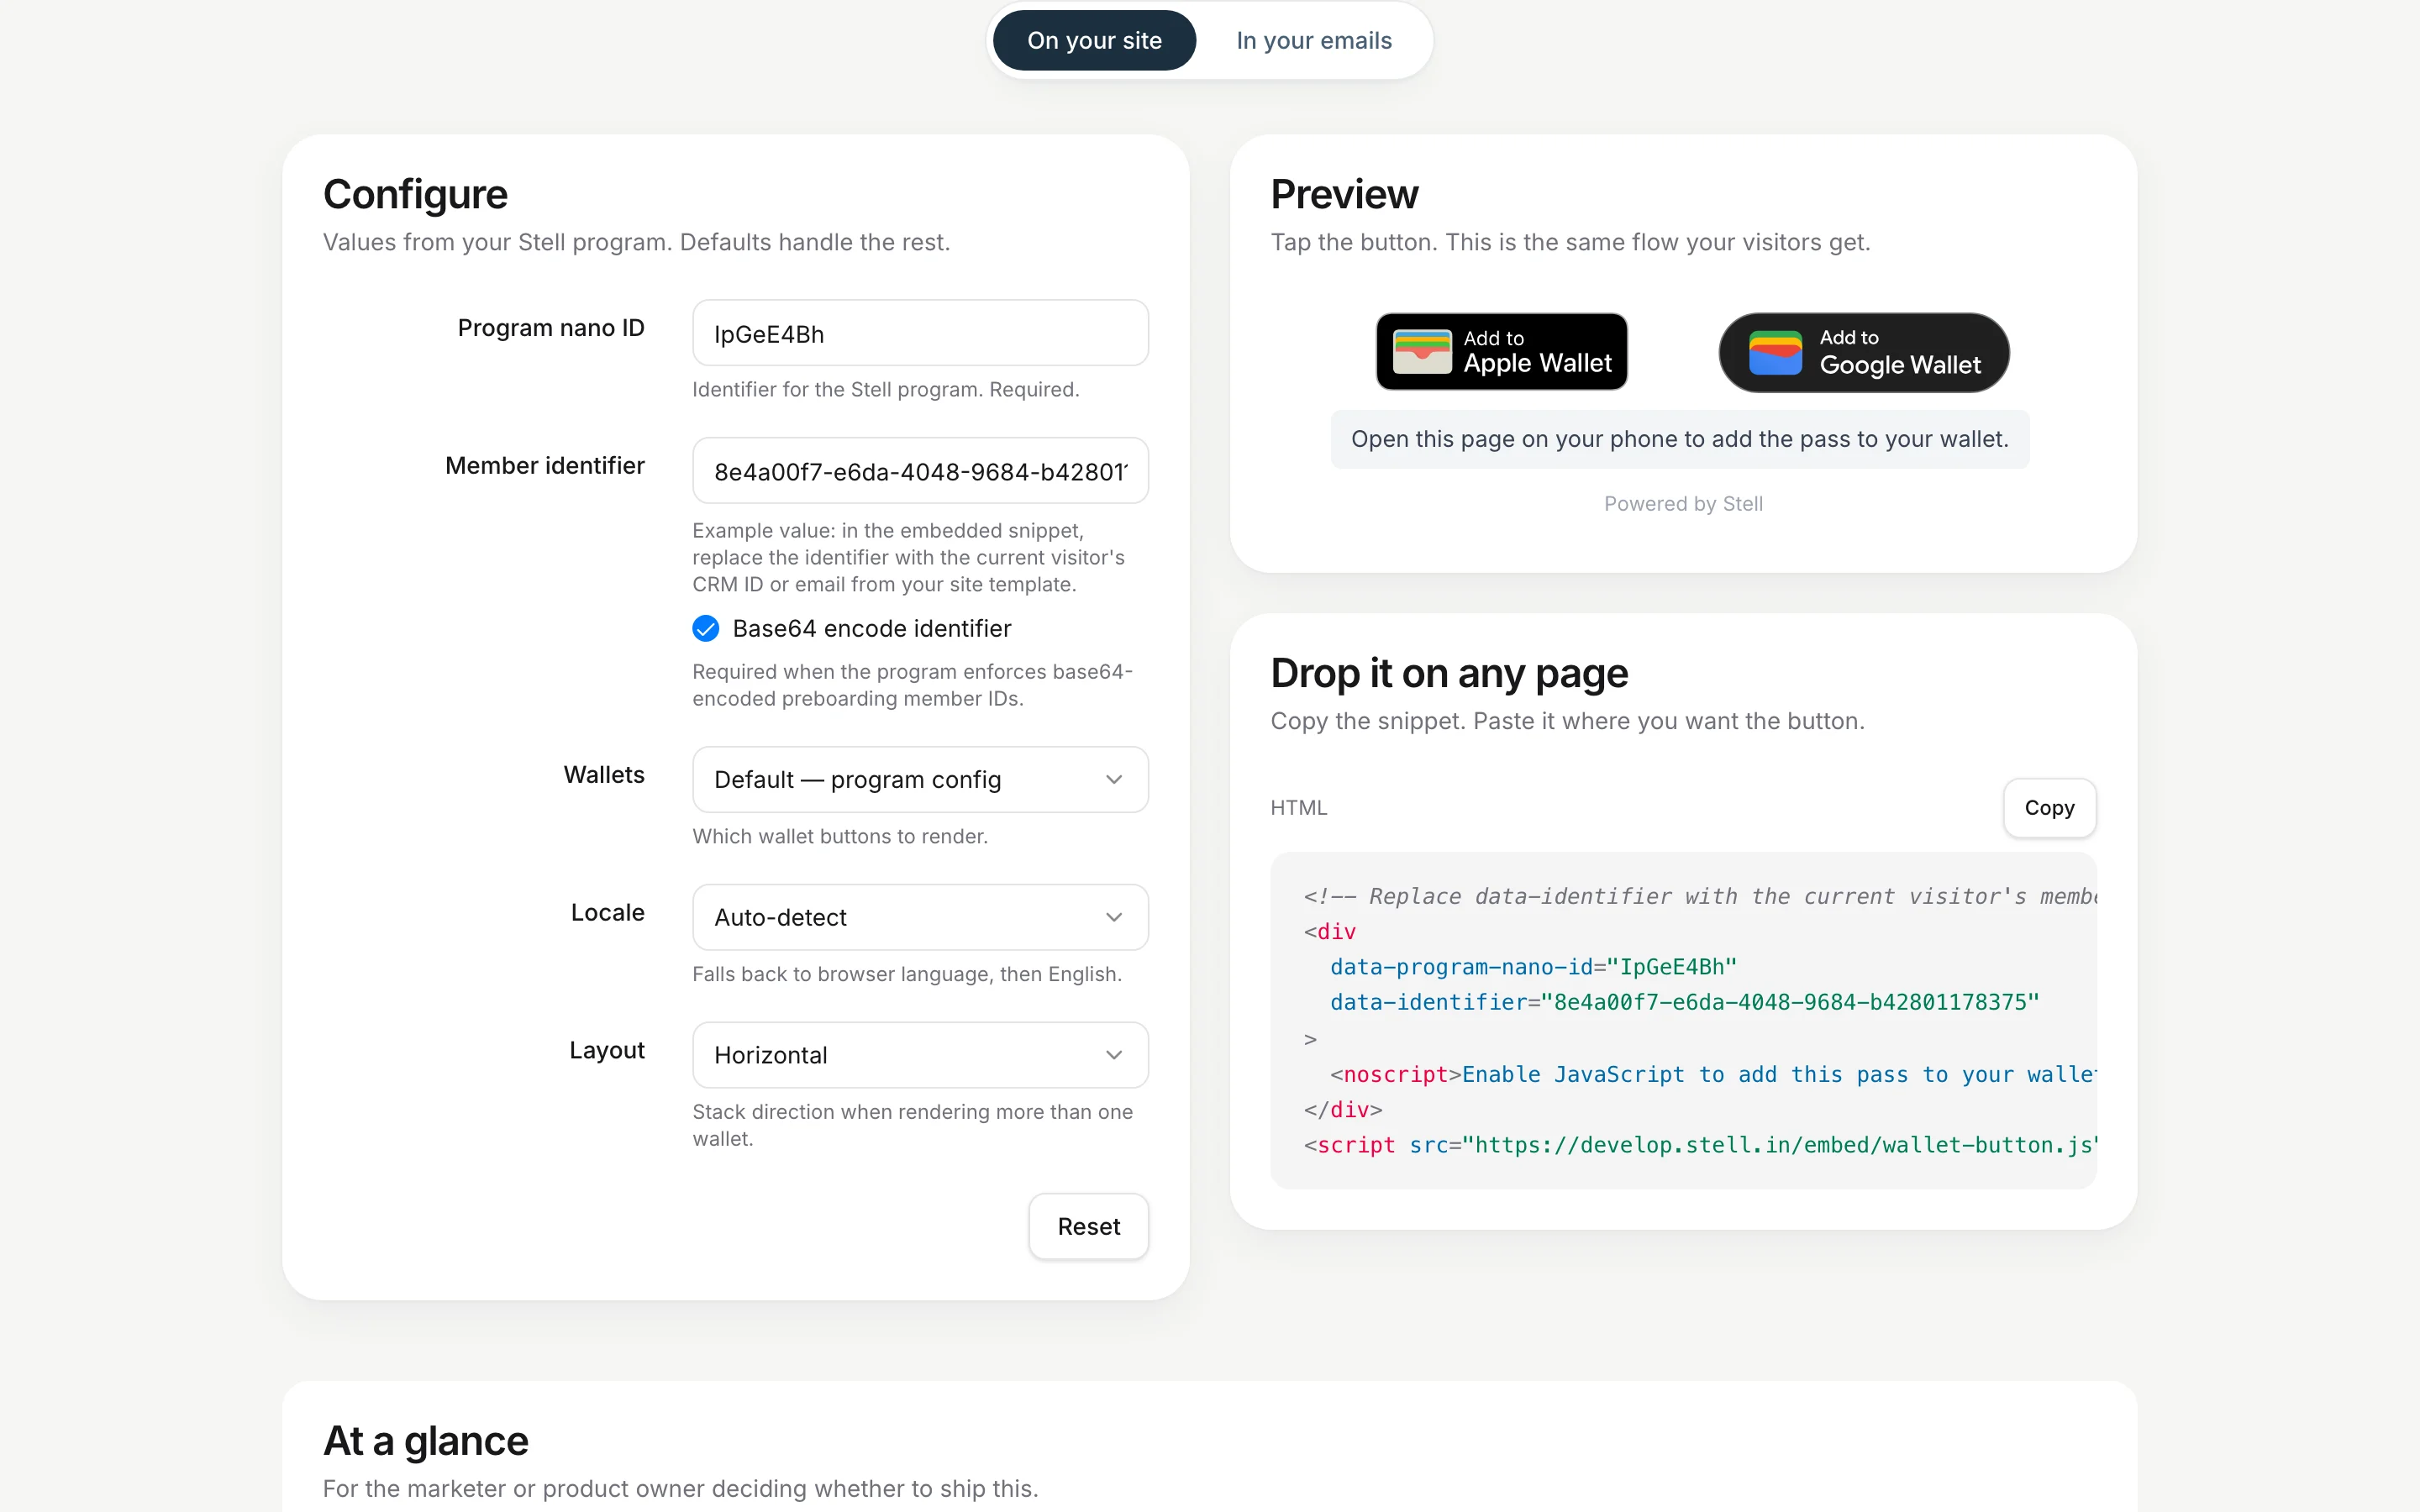
 On the **On your site** tab you set:
| Option | What it controls |
| ---------------------------- | ------------------------------------------------------------------------------ |
| **Program nano ID** | Which program the button issues passes for |
| **Member identifier** | A test value for the preview — replaced per visitor in production |
| **Wallets** | Which wallet buttons render — see [the options below](#wallet-options) |
| **Locale** | The language of the button labels (defaults to the visitor's browser language) |
| **Layout** | Whether multiple buttons stack horizontally or vertically |
| **Base64 encode identifier** | Leave on unless Stell has told you otherwise |
The **Preview** card renders the real button with your test values — tapping it runs the same flow your visitors get.
### Wallet options
| Setting | What renders on the page |
| ---------------------------- | ------------------------------------------------------------------------------------------------------------------------------------------------------------------------------------------------------- |
| **Default — program config** | A button for every wallet your program supports — both **Add to Apple Wallet** and **Add to Google Wallet** if your program offers both. The safe choice for most sites. |
| **Apple Wallet** | Only the Apple Wallet button, on every device. |
| **Google Wallet** | Only the Google Wallet button, on every device. |
| **Apple + Google** | Both buttons, on every device — an Android visitor will also see the Apple Wallet button, and an iPhone visitor the Google Wallet one. |
| **Auto — detect device** | Picks by the visitor's device: only the Apple Wallet button on iPhone, only the Google Wallet button on Android, and both on desktop. Use this to avoid showing a button the visitor's phone can't use. |
Whatever you pick, the widget never shows a button for a wallet your program doesn't support — the selection is always filtered against your program's configuration. Further down the page you'll find a built-in integration guide with a pre-launch checklist, Content Security Policy notes, a Shopify example, and troubleshooting.
## On your site
On the **On your site** tab you set:
| Option | What it controls |
| ---------------------------- | ------------------------------------------------------------------------------ |
| **Program nano ID** | Which program the button issues passes for |
| **Member identifier** | A test value for the preview — replaced per visitor in production |
| **Wallets** | Which wallet buttons render — see [the options below](#wallet-options) |
| **Locale** | The language of the button labels (defaults to the visitor's browser language) |
| **Layout** | Whether multiple buttons stack horizontally or vertically |
| **Base64 encode identifier** | Leave on unless Stell has told you otherwise |
The **Preview** card renders the real button with your test values — tapping it runs the same flow your visitors get.
### Wallet options
| Setting | What renders on the page |
| ---------------------------- | ------------------------------------------------------------------------------------------------------------------------------------------------------------------------------------------------------- |
| **Default — program config** | A button for every wallet your program supports — both **Add to Apple Wallet** and **Add to Google Wallet** if your program offers both. The safe choice for most sites. |
| **Apple Wallet** | Only the Apple Wallet button, on every device. |
| **Google Wallet** | Only the Google Wallet button, on every device. |
| **Apple + Google** | Both buttons, on every device — an Android visitor will also see the Apple Wallet button, and an iPhone visitor the Google Wallet one. |
| **Auto — detect device** | Picks by the visitor's device: only the Apple Wallet button on iPhone, only the Google Wallet button on Android, and both on desktop. Use this to avoid showing a button the visitor's phone can't use. |
Whatever you pick, the widget never shows a button for a wallet your program doesn't support — the selection is always filtered against your program's configuration. Further down the page you'll find a built-in integration guide with a pre-launch checklist, Content Security Policy notes, a Shopify example, and troubleshooting.
## On your site
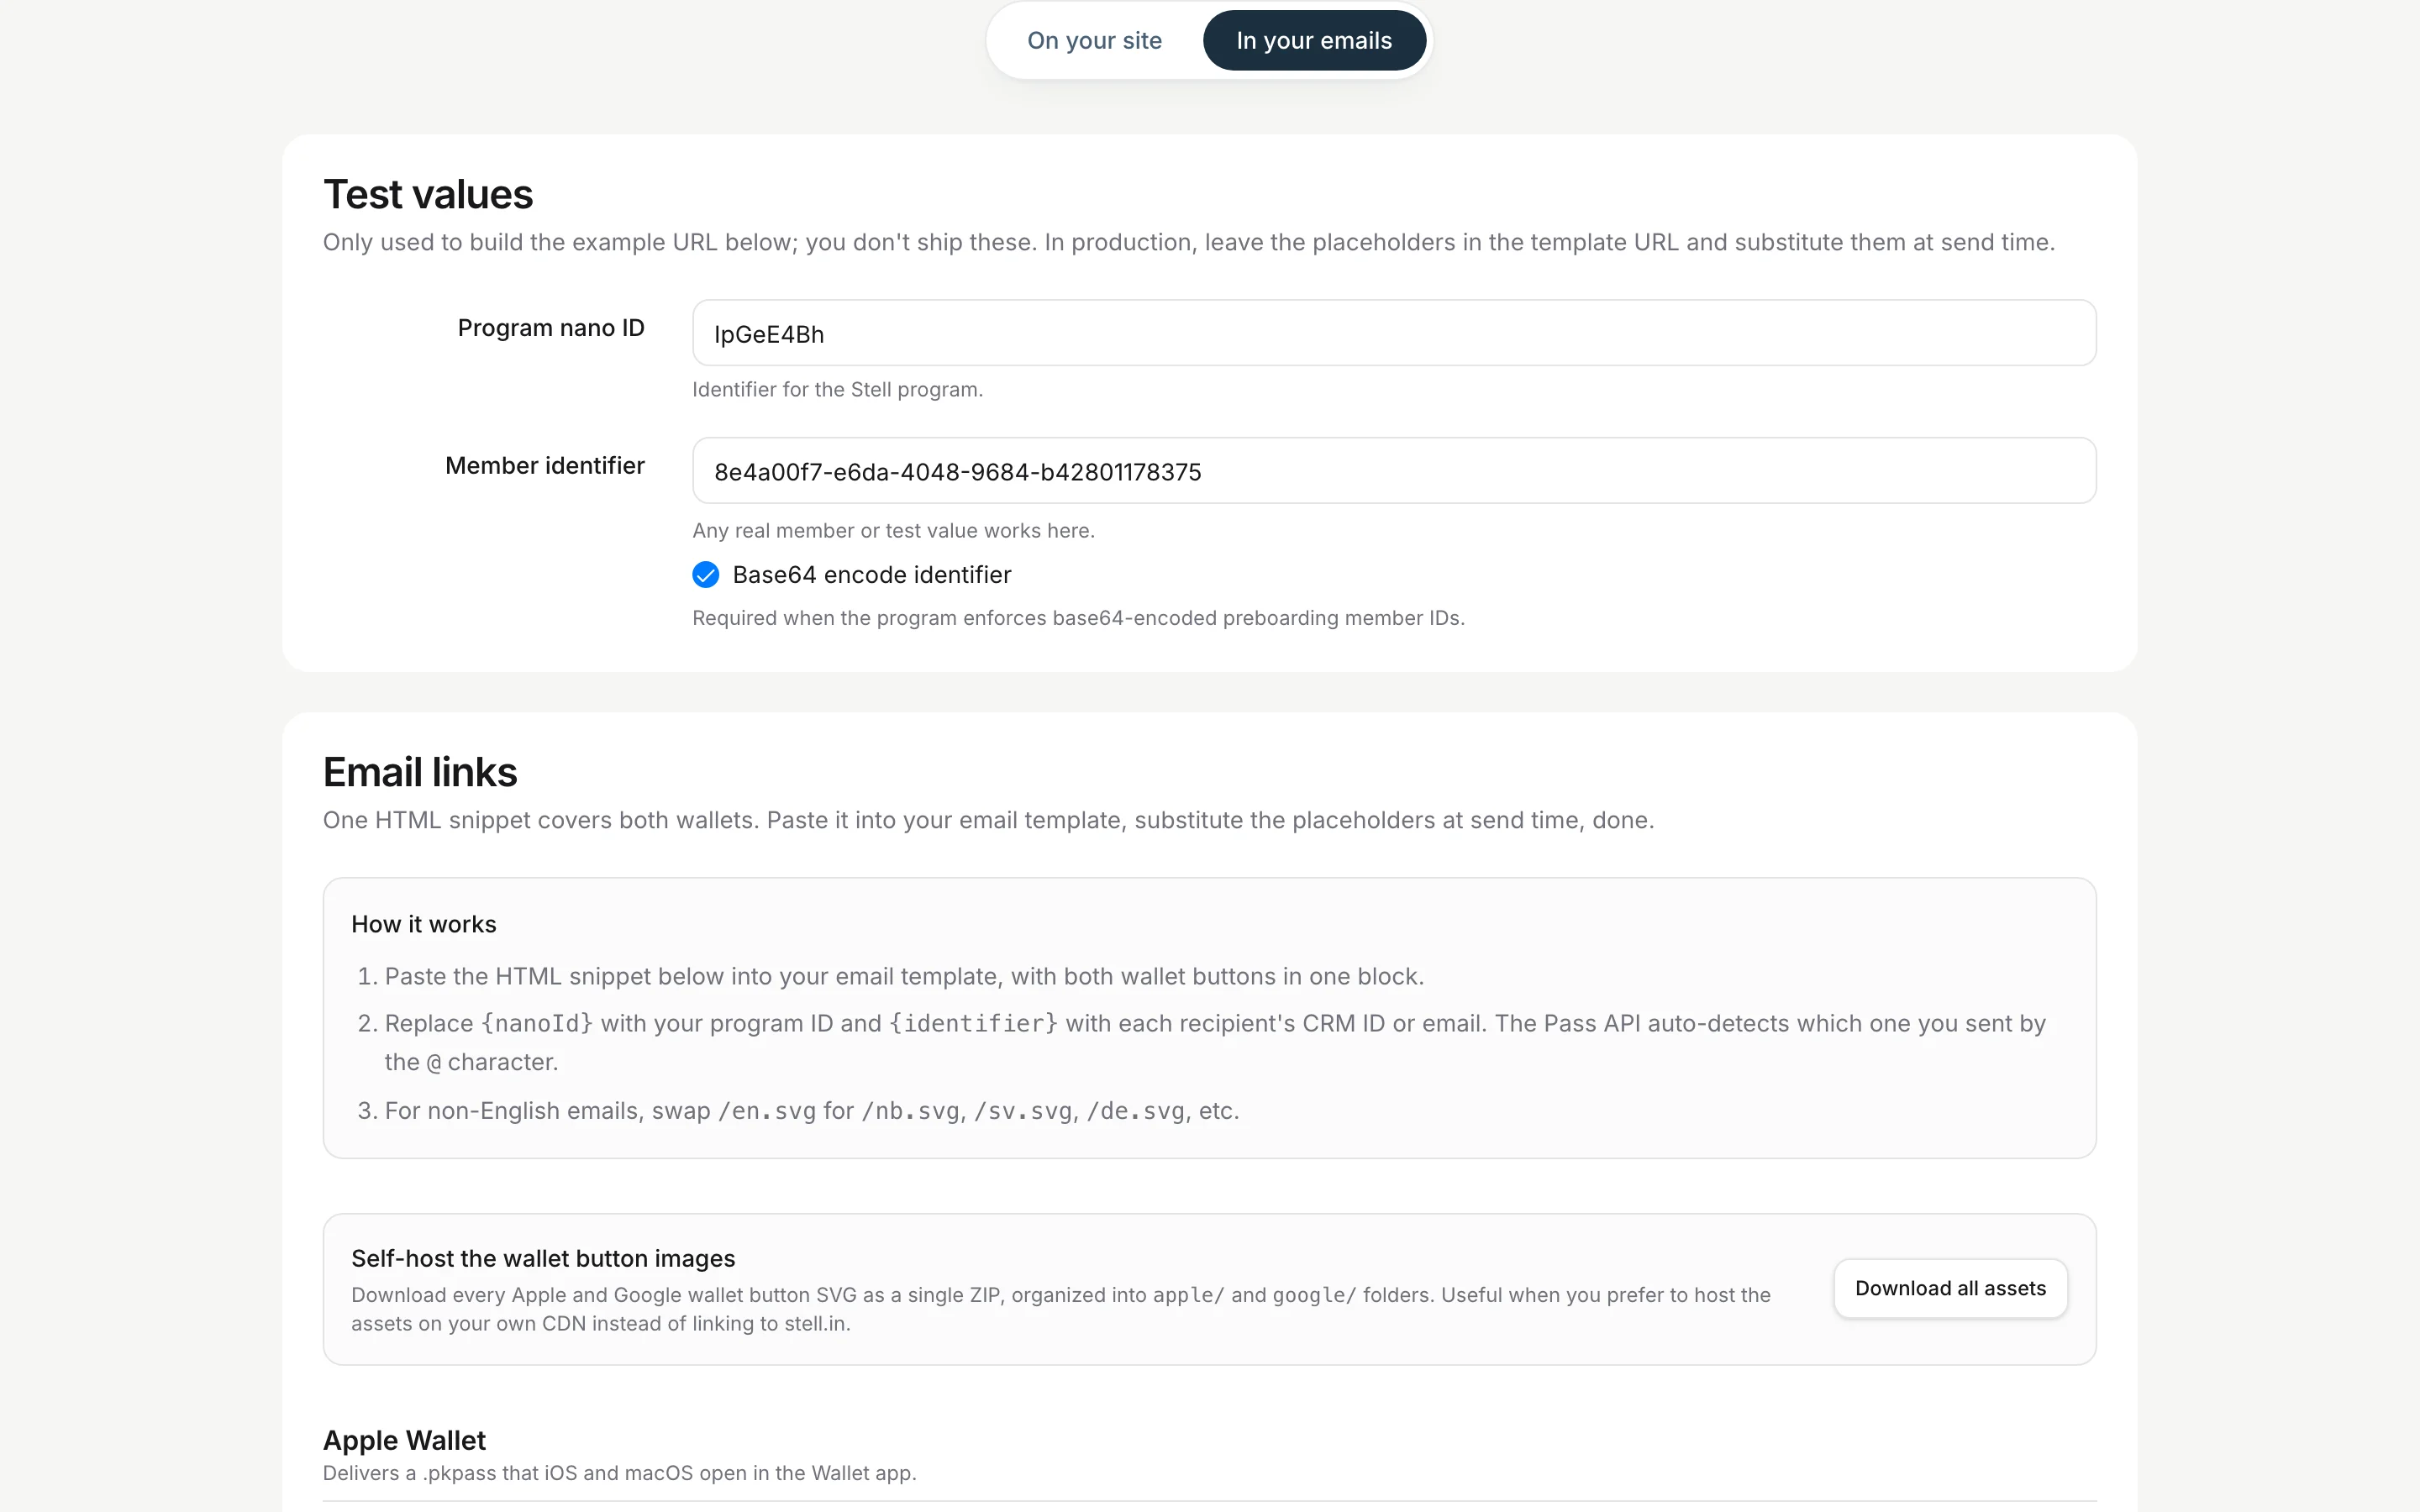 1. Paste the HTML snippet from the **Email links** card into your email template. It contains an **Add to Apple Wallet** and a **Add to Google Wallet** button, each linking to a URL template like `https://stell.in/api/pass/{nanoId}/{identifier}?wallet=apple`.
2. At send time, have your email tool replace `{nanoId}` with your program's nano ID and `{identifier}` with each recipient's CRM member ID — or their email address; the link works with either.
3. For non-English emails, swap the button image's `/en.svg` for the matching language (`/nb.svg`, `/sv.svg`, `/de.svg`, and so on).
1. Paste the HTML snippet from the **Email links** card into your email template. It contains an **Add to Apple Wallet** and a **Add to Google Wallet** button, each linking to a URL template like `https://stell.in/api/pass/{nanoId}/{identifier}?wallet=apple`.
2. At send time, have your email tool replace `{nanoId}` with your program's nano ID and `{identifier}` with each recipient's CRM member ID — or their email address; the link works with either.
3. For non-English emails, swap the button image's `/en.svg` for the matching language (`/nb.svg`, `/sv.svg`, `/de.svg`, and so on).